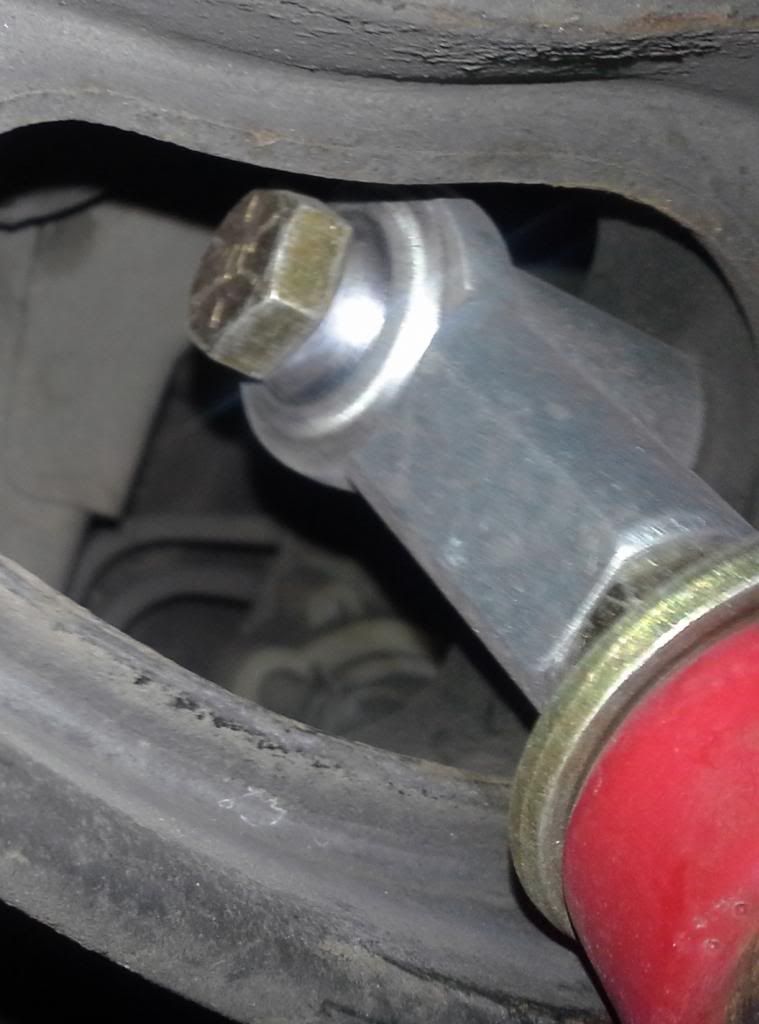
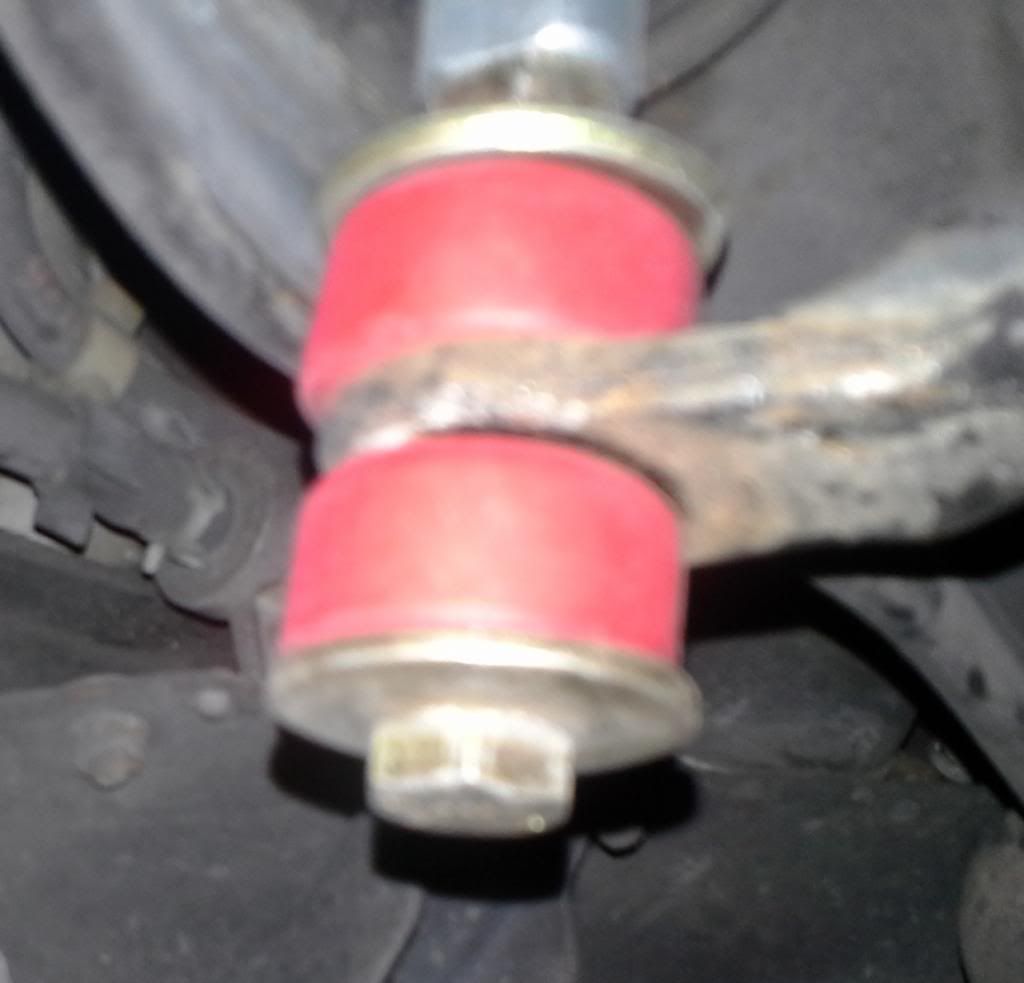
How to install Energy Suspension LCA bushings, with Pics

This forum is for Discussion on Suspension issues.
Post Reply
stevesei
Regular Member
Posts: 82
Joined: July 20th, 2008, 4:38 pm

How to install Energy Suspension LCA bushings, with Pics

Post by stevesei »

I have been planning to install Energy Suspension 4.3152 urethane bushings on my GS lower control arms for some time, but could not get a definitive picture of the installation, either from various forums or from the ES installation guide. I finally called ES tech support and got the lowdown. After that the installation went great and the finished installation is exactly what I wanted, which is way better than I expected. The car is now very positively controlled and feels great, so here is a step-by-step of the process.

1. Purchase an Energy Suspension 4.3152 bushing kit for approximately $25 USD, plus shipping. Many suppliers carry this kit. It contains 2 urethane front bushings with steel inserts, 2 rear bushings with inserts, 2 large, heavy duty washers, and a small tub of ES urethane grease. The instructions DO NOT include the following details!

2. Purchase or acquire a set of any year Escort ZX-2 LCA rear bushing carriers. I tried/measured 4 different sets, including both early and late MX-3, and only the ZX-2 carriers were the correct internal diameter for the urethane bushings. Double check for an ID of the OEM bushing shell at a little less than 36mm.

3. Remove the LCAs from the car. Remove the swaybar links, ball joints, front pivot bolt, rear pivot shaft nut, and the rear bushing carrier. Mark the carriers right/left if they aren't already marked, and mark them so that you cannot mistake the FRONT of the carriers. Match up the ZX-2 carriers and mark them too. Use a punch or some other system not affected by heat.

4. Remove the front LCA rubber bushing. Put the LCA in a large vise of other holder. Trim the rubber flange from the front of the front bushing. a saw or razor knife works fine. Use a propane torch to heat the front bushing housing. Try not to burn the rubber, as it turns into a sticky black mess that won't harden. Get the steel ring around the existing bushing very hot. This releases the bond between the rubber and the steel. The rubber will be smoking when the steel is hot enough. Use a large socket (I used 27mm) turned inside out, with an extension and a hammer to drive the old bushing out. This should only take 2 or three blows; you shouldn't have to BEAT it out. If it won't move, the steel isn't hot enough. When this is right, the bushing just pops out. Repeat for the second LCA.

5. While the LCAs are cooling, use the same process to remove the old bushings from the rear bushing carriers.

6. Prepare the bores where the old bushings were by sanding with medium emery cloth. The residue comes right out and leaves a clean bore for the new bushings.

7. Install the front bushings. Put some soapy water on the outside of the front bushing and press it into the front of the LCA, using heavy hand pressure. Mine installed this way, but you might need to use a vise or a big C-clamp to press this
bushing into place. The large washers that came with the kit make handy surfaces for pressing the bushings.

8. Install the rear bushings. MAKE SURE YOU IDENTIFY THE FRONT OF THE CARRIERS. It is really hard to remove these bushings if you put them in backwards! Using soapy water, press the bushing into the FRONT of the carrier. Mine needed to be pressed in after they got started by about 1/2 inch. Yours may go in easier, but if not, DO NOT HAMMER THEM IN! Use a vise or C-clamp, and again, the washers make handy surfaces to press against. Press them in until the urethane flange presses on the flange of the carrier.

9. Install the inner bushings. Use the ES grease to thoroughly grease the inside of the urethane bushings. There are grooves there to help hold the grease. The front bushings were able to be installed by hand on my set. Yours may need to be pressed in. DO NOT BANG THESE UP BY TRYING TO HAMMER THEM IN! I was able to push the rear bushings in about 1/2 inch on my setup; they needed to be pressed in the rest of the way. Both front and rear bushings should end up flush with the surface of the urethane flange.

10. Install the LCAs. Fit the front bushing into its housing and install the front pivot bolt finger-tight. Slide a large ES washer over the pivot shaft, and install the rear carrier onto the shaft. Install one of the stock washers behing the bushing and install the nut and lockwasher hand-tight. Flex the assembly so that the outer mounting bolt on the side with two holes lines up with the bolt hole. Insert a bolt and screw it in part way. Use a drift or large screwdriver to lever the other end of the carrier FORWARD until the alignment tab locks into its slot on the mounting point. tighten the carrier bracket bolts, install the ball joint and swaybar link and tighten.

11. Set the car on its wheels; tighten the front and rear pivot bolts to 69-93 lb.

12. Don't forget to have the front end aligned; the settings WILL have changed.

I have included some pictures below that show some of the steps in the process, as well as installed, finished bushings. Enjoy your bushings. I love mine!

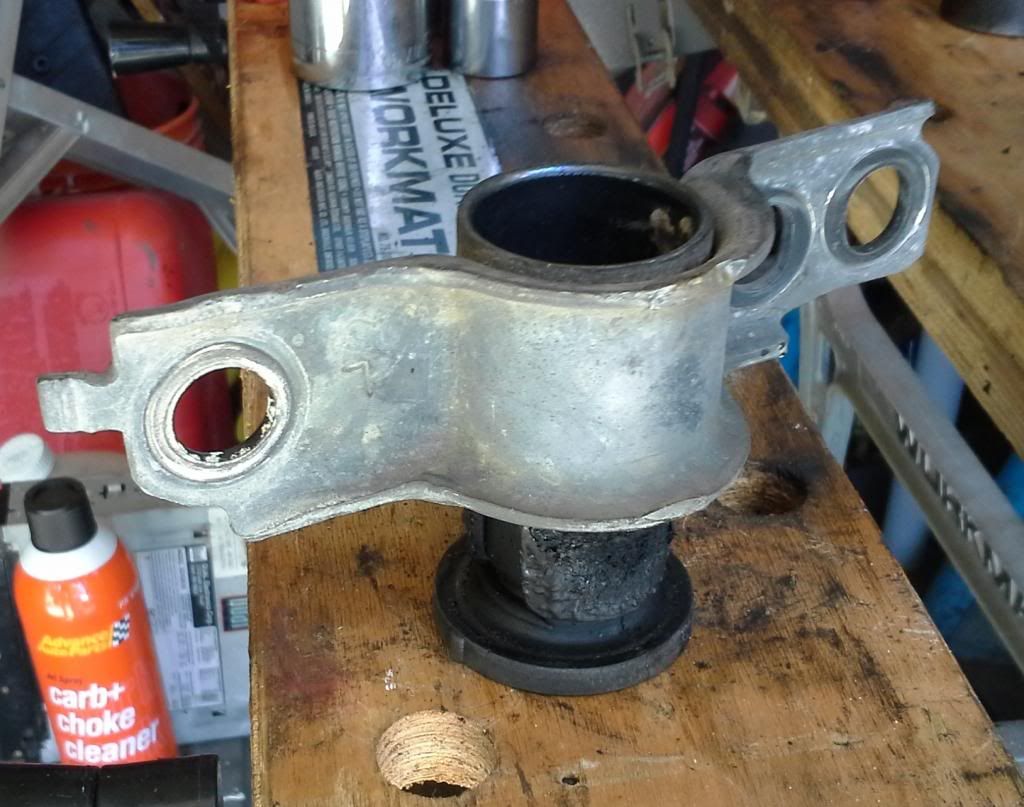
Below, rear bushing awaiting one more little push to be out of the housing. Note the 2 holes; put a bolt thru the outer hole first, then lever the other end into position during installation. Also note that the flanges are usually marked "L" or "R"; this one is marked "L". Make sure to dentify the FRONT of the housing and mark it. Here, we are looking down at the rear of the housing; the FRONT has the cutout around the single bolt hole.
Image

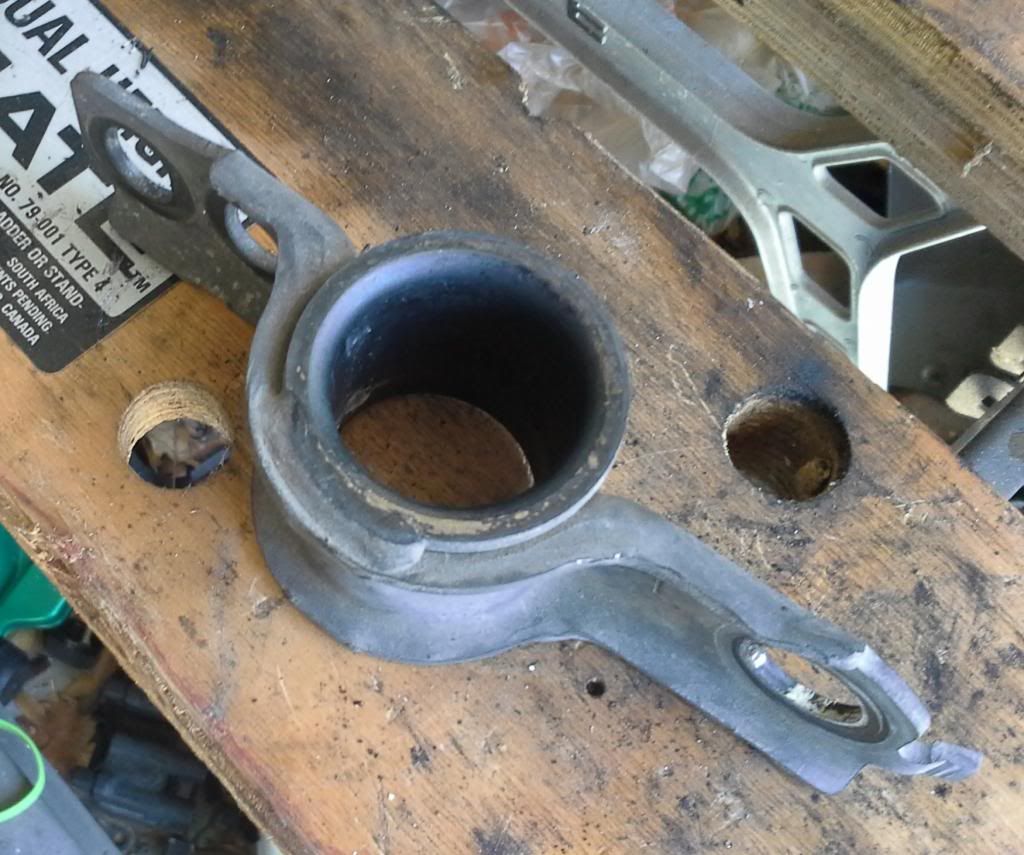
Below, rear housing bore after cleaning.
Image

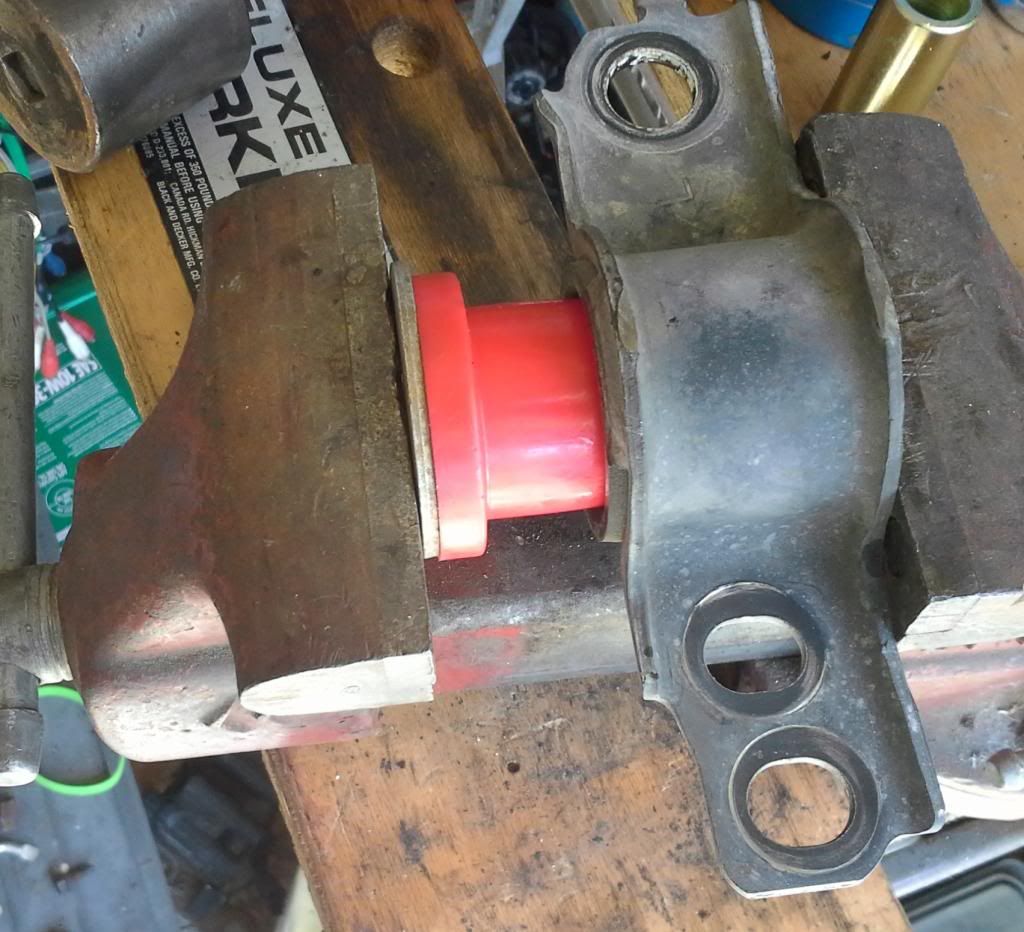
Below, rear bushing as it is pressed into place into the FRONT of the housing. Note use of the large washer. Also note the end with 2 bolt holes; put a bolt thru the outer hole first, then lever the other end into position during installation.
Image

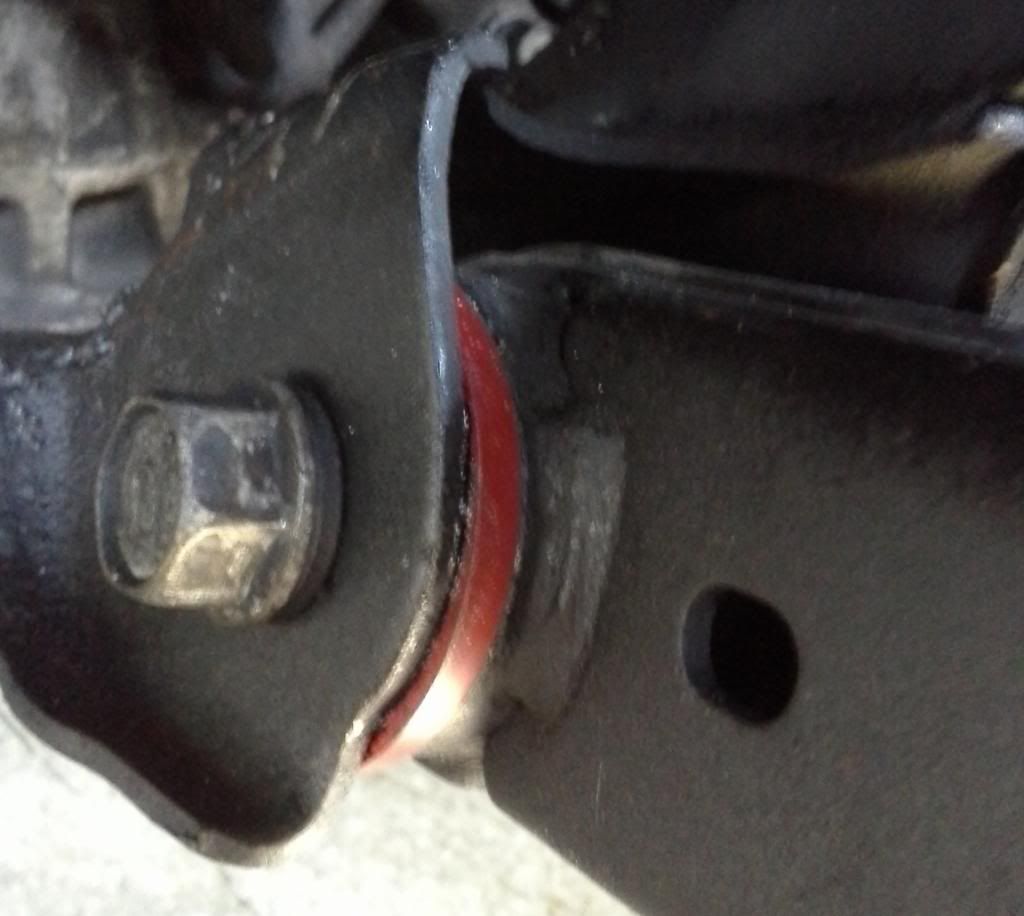
Installed Left LCA front bushing. Flanges face the FRONT of the car! Image
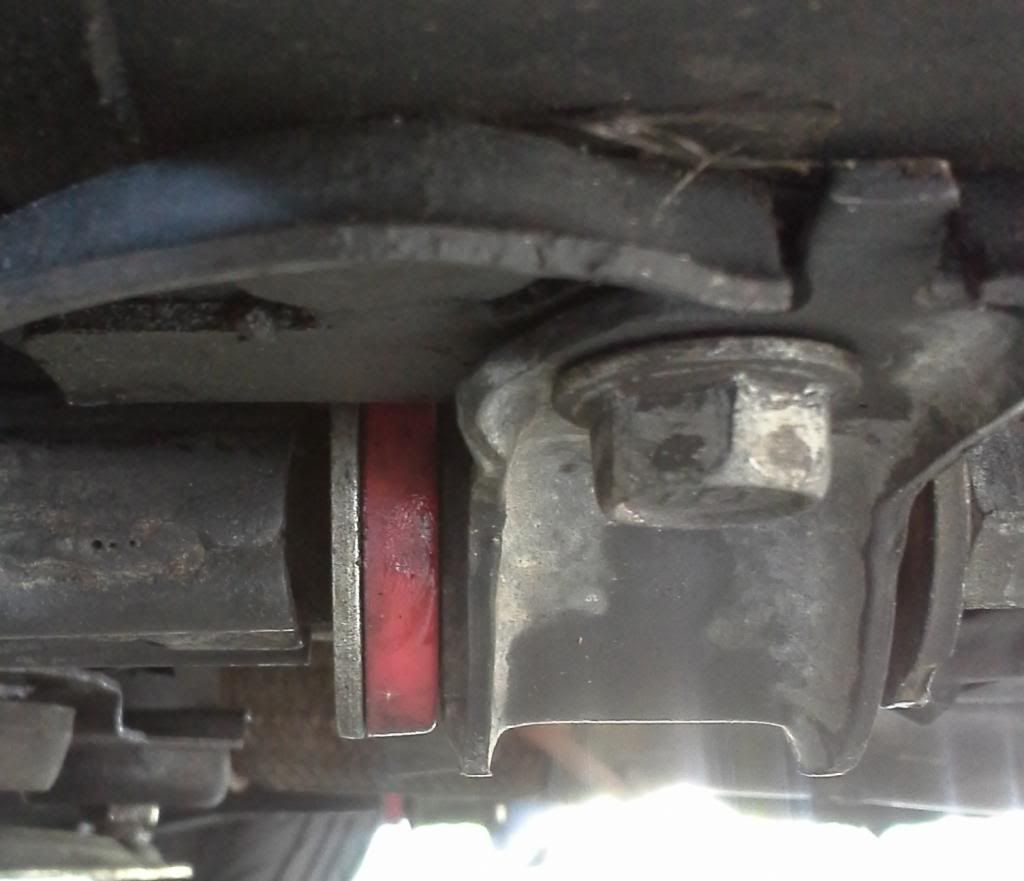
Left LCA rear bushing in place, with washers. Note the locating tab at the top and the cutout around the bolt hole. Once the other end of the housing is bolted in, it will take some levering to get that tab in place using a drift or screwdriver. Once in, everthing bolts right up!
Image
Last edited by stevesei on April 30th, 2013, 9:34 pm, edited 11 times in total.
Steve Seiter
Blue '92 GS, Milly square-port DE with stainless headers, Stoker100 chip, HEI/Blaster conversion,
2.25" exhaust, High flow cat, ZX-2 shocks, short shifter, urethane front bushings, 17x7s with 595 Evos
User avatar
MrMazda92
Supporting Member
Posts: 5201
Joined: October 8th, 2009, 5:35 pm
antispam: No
Location: Midwest

Re: Energy Suspension LCA bushing installation details

Post by MrMazda92 »

Love it!!!!

In what specific areas did you feel improvement?

Increased cornering stability?
Road noise more or less noticeable?

This has been on my to-do list for an awful long time, and now appears to be very affordable... :D
Daily:
'12 Challenger R/T + STP - 3.92 w/ LSD, JG Cam, headers, SkipShift delete, Clutch Delay Valve delete, Hurst STS, RAM Clutch Adjuster, StopTech 6 Piston Brakes, Sticky Nittos, 435 WHP

Kid Hauler:
'08 Suburban LT 4WD - TVS 1900 Blower, LF SC Cam, headers, AFM delete, true 5" lift, 33x12s, 523 WHP

First Love:
'92 GS 5 spd - Straightneck KL/67mm TB, MegaSquirt/Coilpacks, 5 lugs/Speed6 brakes/FD wheels, wiretuck, coilovers, headers, AEM WB, Borla
Deleted: VAF/Power Steering/Air Conditioning/EGR/ABS/Auto Seatbelts/etc
stevesei
Regular Member
Posts: 82
Joined: July 20th, 2008, 4:38 pm

Re: Energy Suspension LCA bushing installation details

Post by stevesei »

$25 and some propane gas is as cheap as mods get!

I got rid of ALL the supension noise I was getting from 20+ year-old front bushings, I got my right-side caster back ( the old bushing had the LCA sitting 1/2" father back in the frame) so no more pull to the right, and the steering is way more responsive. I also felt I was getting substantial toe change with the old bushings. I am really sure this fixes all that can be fixed without spherical bushings. I forgot to note that my kit came with bushings made of two different materials. The front bushings are a translucent red material and seemed harder than the rear bushings. My guess is that this is to tame the toe change.

I replaced the swaybar links at the same time, they had a lot to do with the noise, but the steering response is MUCH better. I had newish rear bushings in before and they did't do much when I replaced them. I can FEEL this fix.

Rear bushings are next!

I did this post because there was a bunch of non-/poor-/misinformation out there about the LCAs. I especially didn't like the posts that talked about spending hours drilling the bushings out and then having to hammer the new ones in. I'm not from the "get a bigger hammer" school of mechanicking! This mod wasn't as big a job as it seemed, and it did exactly what it was supposed to do.
Last edited by stevesei on April 21st, 2013, 12:24 pm, edited 1 time in total.
Steve Seiter
Blue '92 GS, Milly square-port DE with stainless headers, Stoker100 chip, HEI/Blaster conversion,
2.25" exhaust, High flow cat, ZX-2 shocks, short shifter, urethane front bushings, 17x7s with 595 Evos
stevesei
Regular Member
Posts: 82
Joined: July 20th, 2008, 4:38 pm

Re: Energy Suspension LCA bushing installation details

Post by stevesei »

Oh, I forgot! You asked about road noise. Maybe Mazda engineering's instrumentation could detect a change, but I can't; road noise depends entirely on the tires and road surface; these bushings didn't change it.

As a matter of fact, I have urethaned all of my engine mounts, front LCAs, the shifter mount, and the rear swaybar link and I STILL don't feel any difference in NVH (noise-vibration-harshness).

Someday soon, I'll post my 21mm rear swaybar project. You might like that as well! And my transmission mod, and a progress report on my PhantomGrip LSD!
Steve Seiter
Blue '92 GS, Milly square-port DE with stainless headers, Stoker100 chip, HEI/Blaster conversion,
2.25" exhaust, High flow cat, ZX-2 shocks, short shifter, urethane front bushings, 17x7s with 595 Evos
crazycanadian
Regular Member
Posts: 605
Joined: September 3rd, 2006, 10:29 pm
Location: Langley, BC

Re: Energy Suspension LCA bushing installation details

Post by crazycanadian »

stevesei wrote:Someday soon, I'll post my 21mm rear swaybar project. You might like that as well! And my transmission mod, and a progress report on my PhantomGrip LSD!
Nice write up bud... Which diameter rear bushing cages did you need?? I have a bunch of good info posted about the some of the differences in them posted around here some where... Between the escort/Zx2/323/Protege/Mx3 there are 3 different sizes...

I am curious about your 21mm rear bar project..

How much digging have you done into the phantom grip lsd?? I have installed a few, I haven't been impressed with them at all... The long term affects it has on your diff are really disastrous as well...
clunet
Regular Member
Posts: 43
Joined: October 26th, 2008, 10:18 am

Re: Energy Suspension LCA bushing installation details

Post by clunet »

Have Steve,

What years of Escort ZX2 can we pull the carriers from and have them match our cars?

Thanks!
Tim
stevesei
Regular Member
Posts: 82
Joined: July 20th, 2008, 4:38 pm

Re: Energy Suspension LCA bushing installation details

Post by stevesei »

1. I haven't had the PhantomGrip long enough to really know the full ramificarions. I looked it over and determined in my own mind that the preparation of the side gears was probably where peple get their issues. I had to take >0.130" off mine, so I had them surface ground (not milled) by a good machinist. I am getting reduced slippage and don't hear any noises, expensive or otherwise. I'm using the Royal Purple 75-90 with LSD additives (mostly for the copper synchros, but for the PG as well). I'll let you know in a few thousand miles. LOL

2. The carriers are the same on all year Escort ZX2s, so far as I know (98-01). I got mine off of a 2000. ES says Escort 1992-2001. I KNOW the ZX2 carriers fit. All 323/MX-3/Escort/ZX2 carriers fit the car, but the ES bushings only fit the ZX2 carriers for sure and maybe the Escort ones; you could try the 323 bushings, but no guarrantee at all! I paid $5 each for used ZX2 carriers, so I didn't go much farther.

3. 1.4" sticks in my mind, but I'm sorry I didn't record the actual diameter. Neither of the MX-3 sizes will work. I think all the Mazda cages are too big. EDIT: see my post on 4/21. The carrier I.D. is slightly less than 36mm/~1.41". This is the I.D. of the OEM bushing shell, which remains in place.

4. Swaybar project is a '97 Escort wagon rear bar. You must measure the bar acurately because there were 20mm bars and 21mm bars. 20mm is same as stock, so no point. the 21mm bar is 20% stiffer. The project part is that the Escort uses biscuit style links, MX-3s have a ball joint style link. I fabricated new links using heim joints at the top and Energy suspension urethane biscuits at the swaybar. Otherwise it's plug and play. Pics below:
.
The upper half of the new link showing 3/8" heim joint and the Energy suspension upper biscuit.
Image

The lower half, showing both bisuits and the somewhat grotty Escort wagon 21mm swaybar. Sorry for the slightly fuzzy image; this was an extreme closeup.
Image
Last edited by stevesei on April 21st, 2013, 12:22 pm, edited 1 time in total.
Steve Seiter
Blue '92 GS, Milly square-port DE with stainless headers, Stoker100 chip, HEI/Blaster conversion,
2.25" exhaust, High flow cat, ZX-2 shocks, short shifter, urethane front bushings, 17x7s with 595 Evos
crazycanadian
Regular Member
Posts: 605
Joined: September 3rd, 2006, 10:29 pm
Location: Langley, BC

Re: Energy Suspension LCA bushing installation details

Post by crazycanadian »

Nice bud, the rear link for the sway bar looks good...

For the phantom grip its not so much the side gear prep that causes the long term problems... Its the pressure being placed on the side gears... Every time you corner, every time you get on the power and do get a bit of 1 wheel spin, the side gears chew them selves threw the shim buckets and into the carrier... Eventually it causes the side gears and spiders to chew them selves up..It also side loads the diff pin wearing it out... eventually your diff goes BOOM!... Like I said this is the long term side affect... Depending on how you drive it may take a couple years, or you might not have a problem at all if you are pretty easy on your car..

Interesting info on the zx2 bushings... Here is a link to my bushing info... From what I remember there are 46mm diameter bushings, 48mm and then smaller ones.. I believe they were 42mm...
http://www.clubprotege.com/forum/showth ... -%29/page5
User avatar
kulluminati777
Senior Member
Posts: 2509
Joined: July 11th, 2010, 11:10 am
antispam: ~SPAM*SUX~
Location: Sunny California
Contact:

Re: Energy Suspension LCA bushing installation details

Post by kulluminati777 »

oh man great idea with the endlinks and nice write up. Doesnt an escort some where have a 25mm front sway bar? couldnt you use the same endlink idea for the front as well??
View my worklog: viewtopic.php?f=46&t=77688
Image
stevesei
Regular Member
Posts: 82
Joined: July 20th, 2008, 4:38 pm

Re: Energy Suspension LCA bushing installation details

Post by stevesei »

1. I hear ya about the side cups; we'll see I guess. I based my decision to try the PG on the essentially equal number of raves and razzes about the idea, and the fact that several people seem to have gone extended miles with PGs installed. I full realize there may be issues, but I'm willing to try it. My feeling was that well prepared side gears would have smooth, even action, with no wobbles, catches, or grinding from ragged sliding surfaces. We'll see if I'm even close to right.

2. The bushing carriers, as prepared for the ES bushings, require the original inner shell of the OEM bushings to remain in place. It is the I.D. of this shell that is the important dimension for the ES installation. I just went to the car and measured this dimension as best I could and found I remembered correctly: I.D. is ~1.41 inches, slightly less than 36mm. 35mm is probably too small, 37mm is almost certainly too large. Keep in mind this is a press fit anyway; if it's not, the shell is too large.

3. I looked at the possibility of using a ZX2 25mm front swaybar; it's really tempting! however, looking at the MX-3 bar, the end is so close to the LCA that I'm not at all sure the Escort bar would have room for a modified link. It's soooo much trouble to get the ZX2 bar AND get the MX-3 bar out, that I can't see trying it unless I was doing some engine-out work. I'd love to see someone with a project car give it a whirl.
Steve Seiter
Blue '92 GS, Milly square-port DE with stainless headers, Stoker100 chip, HEI/Blaster conversion,
2.25" exhaust, High flow cat, ZX-2 shocks, short shifter, urethane front bushings, 17x7s with 595 Evos
User avatar
stereoking15
Regular Member
Posts: 326
Joined: August 16th, 2005, 3:51 pm
Location: Portland, OR USA!!!

Re: How to install Energy Suspension LCA bushings, with Pics

Post by stereoking15 »

The carriers you are referring to the first pictures posted? The 3 bolt flanged bracket? Thanks for any clarification.
94 gs ze swapped,front mount oil cooler,b&g springs, kyb gr2 struts, vris deleted, gutted, racing 4 point harness. centerforce dual friction clutch, BREMBO ROTORS X4, CARBOTECH XP10 front pads, ebc green stuff rear PADS, corksport brake lines & clutch line, hei mod w/ msd blaster 3, MAZDASPEED motor mounts, B&M short shifter, M-FACTORY LSD, Carbon fiber hatch with lexan window.
RogueWolf
Regular Member
Posts: 145
Joined: April 11th, 2007, 1:39 pm
Location: Guelph Ontario

Re: How to install Energy Suspension LCA bushings, with Pics

Post by RogueWolf »

Will these help the little problem I have with understeer?
Post Reply

Return to “Suspension/Brakes/Wheels/Tires”