Page 1 of 3
SuperK - '95 Mazda MX-3 RS
Posted: October 16th, 2007, 9:20 pm
by SuperK
 SuperK's '95 Mazda MX-3 RS
-
The Beast | The Nightrider -
It's been a year since I've had my first MX-3, and I do love her.
Now that I have an addition to the family, I can finally start working/playing on my cute little 4 banger. Now that I'm actually working on her, I realize that I really want to keep up with my progress. And I thought, voila! Worklog!
While I'm not doing anything exciting or special, I'M excited. So i'll start slapping up the work I do on her as I collect my pictures and data. yay!
Day 1 - 05/10/2006
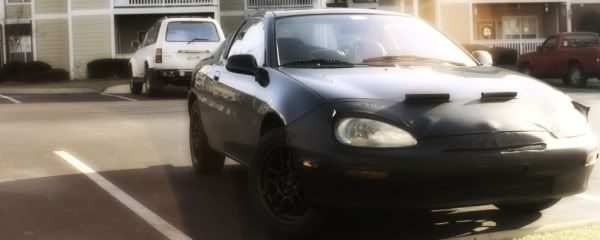
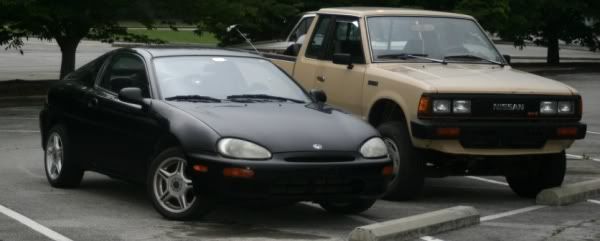 New Ride / Old Ride.
Purchase Price: $2,000.00
94,297 Miles (On both engine/body)
Bone Stock, save:
DeZent 15" Wheels
Large Cannon Exhaust
Re: SuperK - '95 Mazda MX-3 RS
Posted: October 17th, 2007, 1:32 am
by umcamara
SuperK wrote:Bone Stock, save:
DeZent 15" Wheels
Large Cannon Exhaust
Whoa, "save". A throw-back to some Old English. I've never actually heard somebody use that term, except in novels that take place way back when.

Posted: October 17th, 2007, 8:07 pm
by Bumpysbro
one nice mx3 there superk i love black mx3's. especially with no spoiler on the back.
Posted: October 19th, 2007, 3:21 pm
by SuperK
Performance Upgrades
 02/18/2007
Since I've bought the car, I've done a few mods to make the car a bit slower. (No, I said it right, don't try and correct me)
Exhaust
Flowmaster 60 Series
Flowmaster Hushpower
Magnaflow High-Flow Cat
Genie Headers
2" Piping
 Flowmaster 60 Series
As stated, the car had a large cannon exhaust, no silencer. Being my Daily driver, I HAD to do something about my noise. After extensive research, and a few sound clips, I decided on a 3-chamber muffler from Flowmaster.
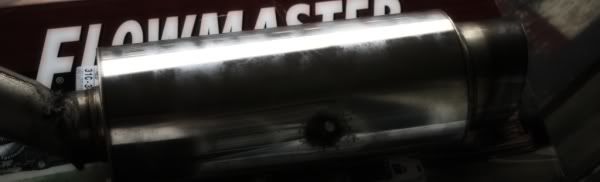 Old Cannon Exhaust
I acually had the muffler installed 3 TIMES. Talk about a waste of money!
1st time, the mechanic I THOUGHT was competent, ended up bending the pipes too close and would rub on the axle. So I brought it back, and he welded a support from the piping directly to the chassis. No flex at all, bad idea. broke open a lot of the flanges and had bad exhaust leaks.
2nd time, I went to Midas, and they fixed the 1st guy's mistake.
3rd time, I bought my Genie headers and a flex joint, so I had him repipe the whole car. But I forgot to buy a replacement resonator, so I had to return to him another day to install my large resonator. He did an excellent job, and I'm very happy with the finished product.
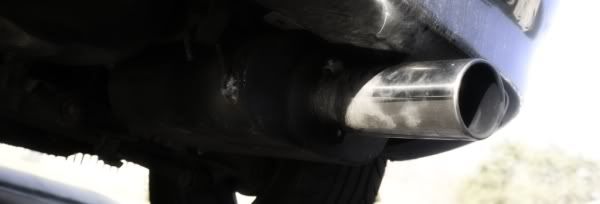
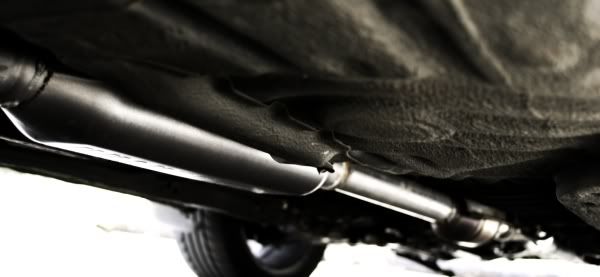 Finished Product
I am very pleased with the results, even though I threw out a lot of money doing so. Live and learn. Wonderful deep, mellow tone sounds great and is very comfortable.
Posted: October 19th, 2007, 3:44 pm
by Mooneggs
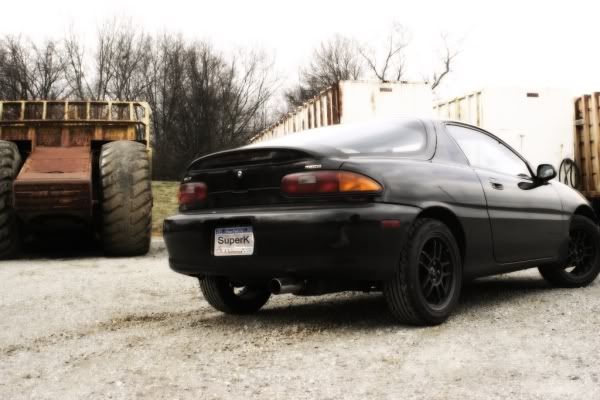
SuperK wrote:
Notice "the beast" in it's natural habitat...

Posted: October 28th, 2007, 7:57 pm
by SuperK
Appearance
 02/16/07
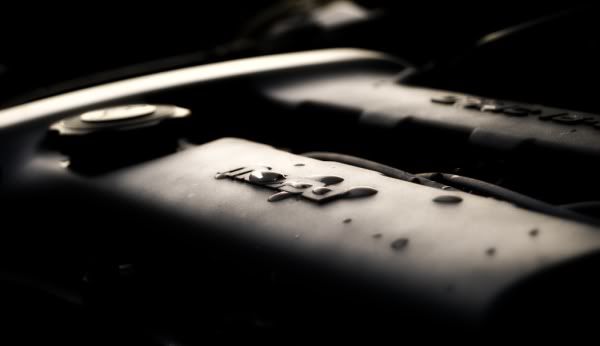
Engine Bay
02/16/07
Engine Bay
I decided to spruce up the engine bay, make it look presentable.
Unfortunately, all work has to be done with the engine in the car, so coverage is limited.
I do what i can, though.
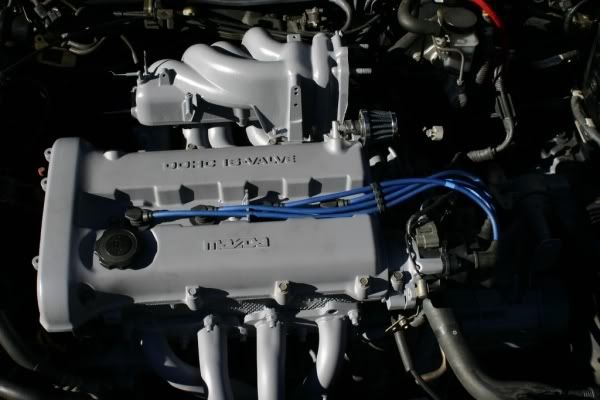
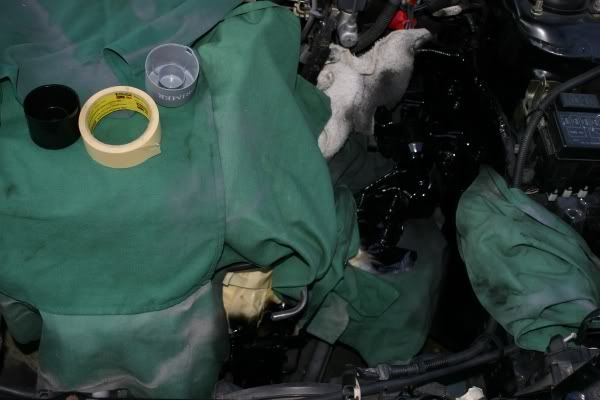
 Unadultered Engine Bay
Tools
Unadultered Engine Bay
Tools
Duplicolor (temp):
High Temp Primer (1200)
Metalcast Ground Layer (500)
Metalcast Gunmetal (500)
Metalcast Blue (500)
Engine Enamel Glossy Black (500)
Engine Enamel Clear (500)
VFW:
Flame Resistant Blue (2000)
The engine bay was cleaned with degreaser and a mild detergent afterwards to ensure there were no unnecessary contaminants and/or grease.
 Laying Down the Primer
Primer on everything, to ensure that all the parts would uniformly show the same shade of color.
 Laying the Ground Layer
On top of primer, all portions of the engine recieving Metalcast paint was added a reflective and light base, the "Ground Layer".
 Fuel rail receiving ground layer
It's hard to decide what portions of the engine will recieve colorful highlights without making the engine bay look gaudy.
 Transmission and intake Manifold completed
Here is the Gunmetal and Blue colors that was chosen.
Overspray isn't taken serious, it will be covered with a layer of black.
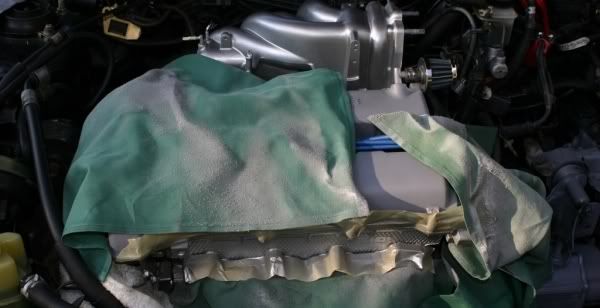
 Engine Mounts being painted
One of the most important issues is to make sure you cover and mask well!
Nothing is worse than shoddy overspray on your finished products.
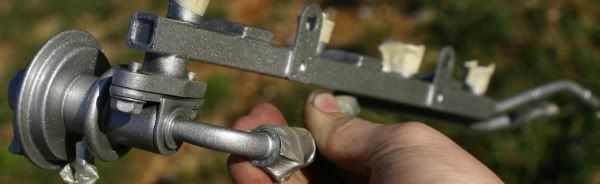
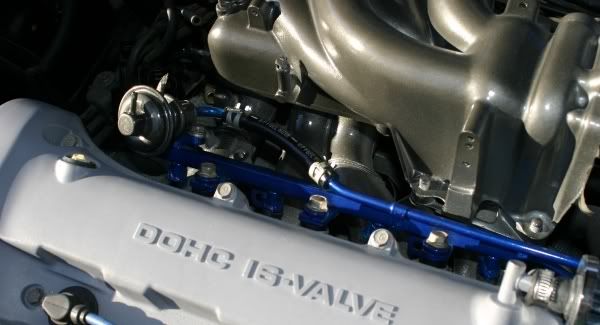 Fuel Rail finished, set in place
I definitely give two thumbs up to gunmetal and blue. I was wary at first, but I am very happy with the contrasting colors.
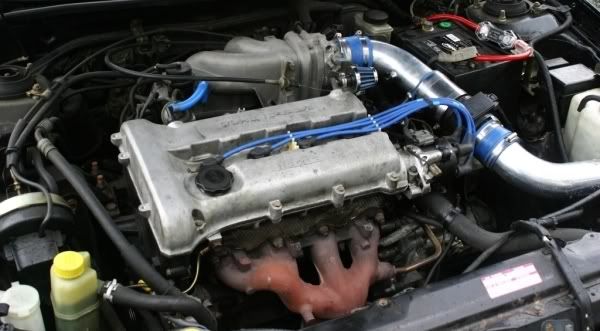
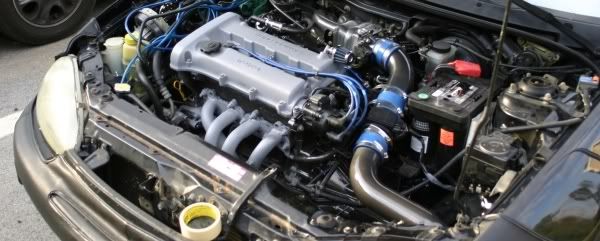 Cold Air Intake painted Gunmetal
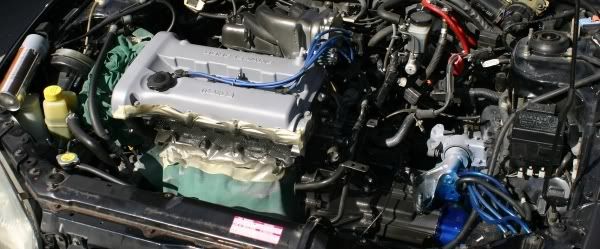
Reassembled the right side of the engine bay. There are a few areas that need touch ups, such as the area around the fuse box and around the master cylinder, but I can get those without having to have the whole side disassembled.
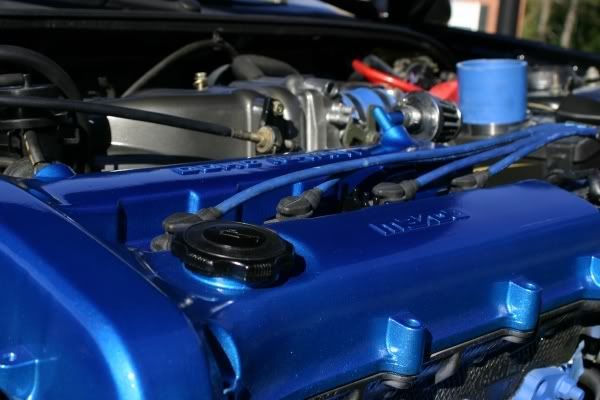 Valve Cover Finished Painted.
(Continued....)
Valve Cover Finished Painted.
(Continued....)
Posted: November 22nd, 2007, 10:19 pm
by 94mxthree
Hey where did you get your genie header at, i looked up on their website but nothing for the mx3,did you use a header for a different car? could you let me know thanks.
Posted: November 23rd, 2007, 12:32 am
by umcamara
Nice work buddy... very clean.
Posted: November 23rd, 2007, 2:33 am
by matt753
Looks very professional and clean, keep up the good work
Re: SuperK - '95 Mazda MX-3 RS
Posted: February 1st, 2008, 6:11 pm
by SMACH503
Where did you get your intake from?
Re: SuperK - '95 Mazda MX-3 RS
Posted: February 6th, 2008, 2:36 pm
by Bumpysbro
if im not mistaken thats the ebay CAI just painted a different color. nice paintjob on your parts superk. im jealous hah
Re: SuperK - '95 Mazda MX-3 RS
Posted: April 3rd, 2008, 8:59 pm
by SuperK
I ran into a few problems... I was driving my fast car, but it went poop so I've been driving THE BEAST round everywhere. I had not the opportunity to finish under the hood.
Some of the gaskets, like the O ring around the disty, aren't sealing right and is leaking oil. The oil somehow got underneath the paint and is causing it to chip on the tranny casing where it drips down. Stupid!
I have to disassemble it, degrease the area, sand it and repaint it. But I can't do that until I get my fast car working again

poo!
Oh well, I have more to write about, just need to get my pishurs straightened out and such.
Re: SuperK - '95 Mazda MX-3 RS
Posted: April 4th, 2008, 3:48 am
by Bumpysbro
mine does the same thing. leaks around the disty all the time, i put a new o ring in there bam leaks again, same thing with my valve cover gasket lol. stupid leaks, car looks very nice though. ever install the cams?
Re: SuperK - '95 Mazda MX-3 RS
Posted: June 6th, 2008, 2:59 pm
by 94drumx3
thats an amazing car!! i love what you've done with it!
and i love how everything is so clean...and all the pictures look like they're "professionally" done
Re: SuperK - '95 Mazda MX-3 RS
Posted: July 20th, 2009, 10:55 pm
by SuperK
Maintenance
Summer 2008
Drivetrain/Suspension/Brakes
CV Axles
Ball Joints
Tie Rods
Front Wheel Bearings
Engine Mounts
Brembo Front Slotted Rotors
Calipers
Akebono Ceramic Brakes
04/14/2009
Engine
Piston Rings
Connecting Rod Bearings
Head Gasket
Hydraulic Lifters
Valve Stem, Front Main, Camshaft Seals
Timing Belt
Idler, Tensioner Pulley
90a Alternator
Belts
Water Pump,Thermostat
Radiator Hoses
Rebuilt Injectors
Front Fuel Filter
Assorted Gaskets, O-rings
After burning a significant amount of oil, pops lent me a hand in replacing the head gasket, along with anything along the way.
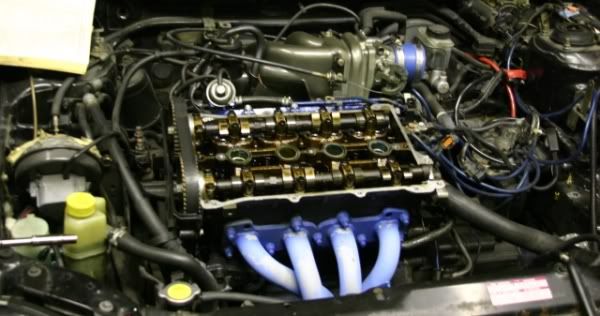 Before rebuild, golden
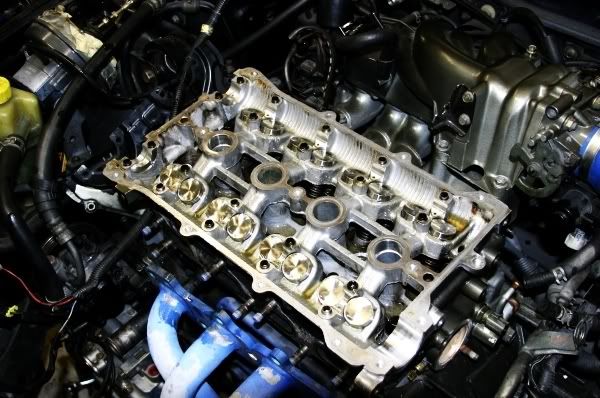 After rebuild, shiny
A four hour trip to my parent's house and we had rebuilt everything on the list besides the rings and the bearings.
Thinking the car was fine, I drove back to Chattanooga, where I live, only to burn through almost four quarts of oil and be greeted by a huge smoke screen the next morning.
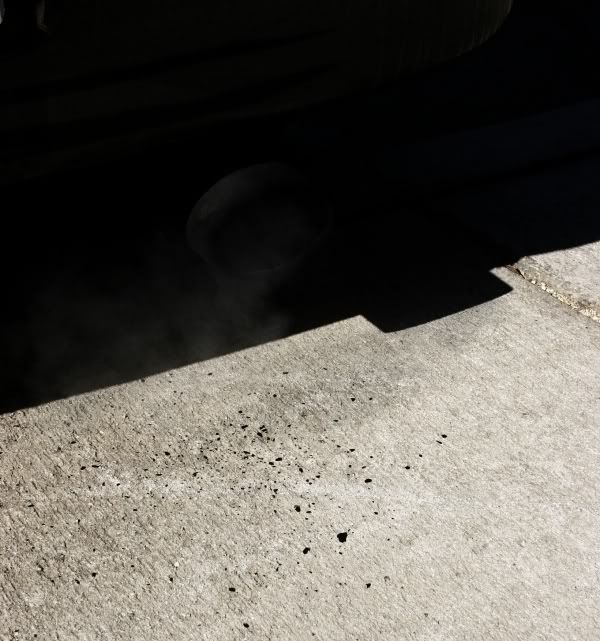 First pooping black, then smokescreen!
The symptoms went from light oil burning to watching oil cover the cylinder head while cranking(sparks out and flashlight, then crank) followed by a slightly sexual "squish" sound as the oil poured from the bottom end.
In my apartment parking lot pops came back up and we re-ringed the engine.
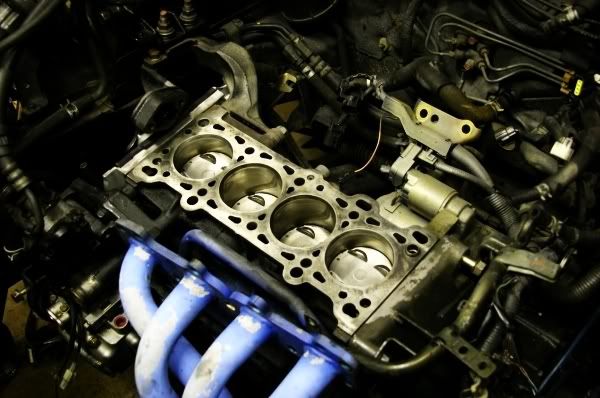 Block cleaned up again, ready for the head
Air Conditioning
04/14/2009
Block cleaned up again, ready for the head
Air Conditioning
04/14/2009
My Mazda rolled out of the dealership without AC.
I completed a full factory AC install and can be seen at this link in the FAQ's:
viewtopic.php?f=24&t=69675" onclick="window.open(this.href);return false;
To-date, the setup still blows cold air.
Alternator
04/14/2009
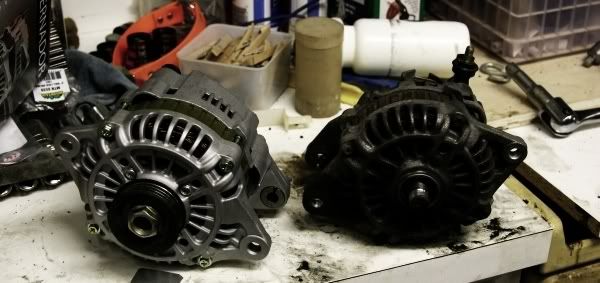 New 90a alternator ordered for a GS
The alternator upgrade was pretty straight-forward. A larger bolt is in order to retrofit the alternator.
I was unable to source the correct size bolt in metric, however a standard size bolt was simple to source.
Simply purchase a correct-size bolt in metric, or both a bolt and an accompanying slim nut to retrofit the new alternator. The bolt will be inserted opposite of your original alternator.