Custom Cruise Control
Posted: May 11th, 2007, 8:25 pm
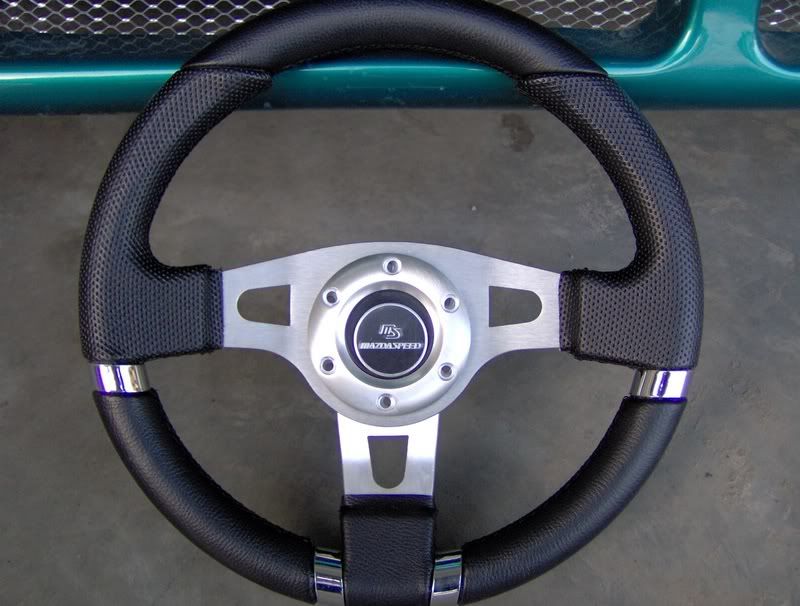
I recently converted my steering wheel over to an aftermarket one and thought I would show pics and explain what I did to acheive this. Bear with me if this sounds choppy or unclear  And hopefully the pictures are somewhat helpful.
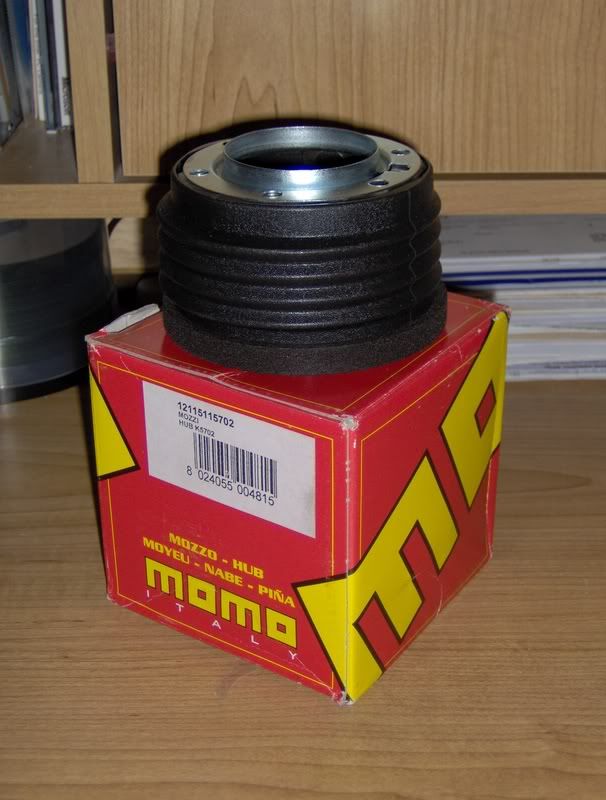
First off, I bought this steering wheel from a fellow MX'r on the board and purchased the MOMO hub to convert.
So undid the bolts from behind the wheel to reveal the wiring and lock nut for removal. Disconnected the wires and removed nut. I rented a steering wheel puller as I like all my teeth and pulled the wheel off.
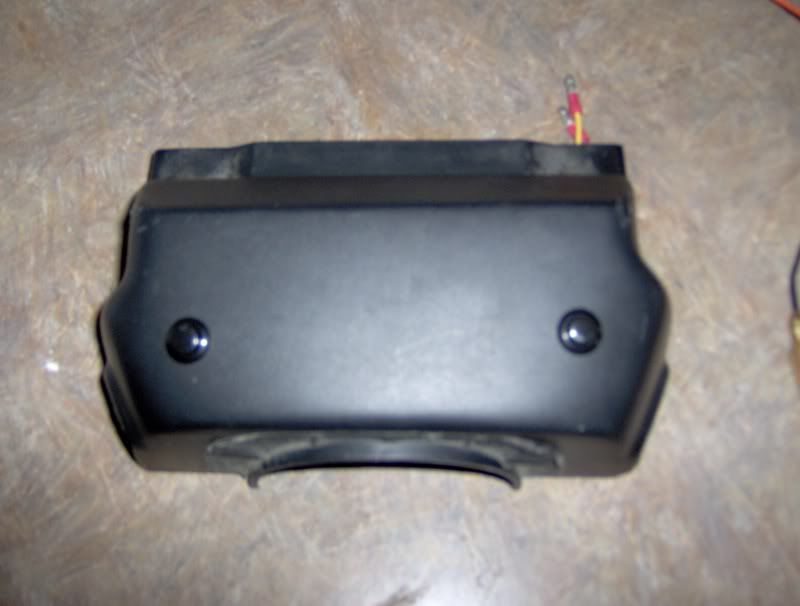
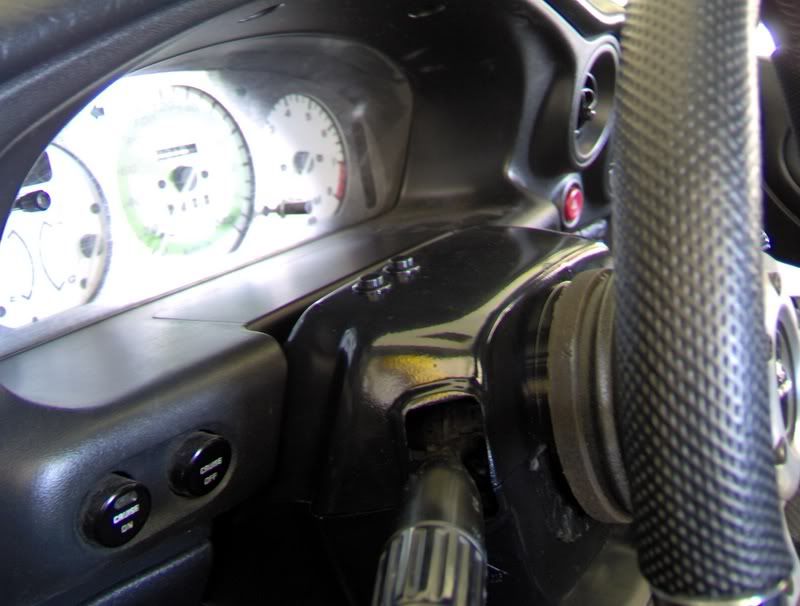
Remove the upper and lower column covers to get at the wiring harness later.
Remove the "power ring" so it is easier and cleaner to trim the raised part of it for power to your horn (if you want it) I used a dremel with a fine sanding disc to shave down the power ring to expose the right "prong" of the ring. If you orientate the ring so the raised portion is at the top, the right one. If you don't want power to the horn, just trim the piece right off flush.
Next I drilled a hole in the hub where the "exposed prong" is located. Make sure the hole is big enough that it won't make contact. After checking the hole clearance, I crimped a connector on the prong. I installed the hub and tightened the lock nut.
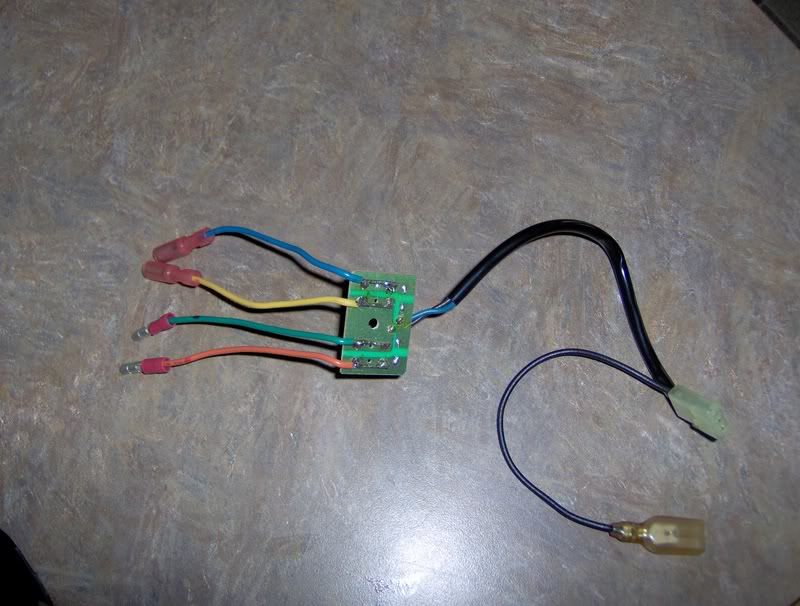
I removed the factory cruise control board from the factory assembly.
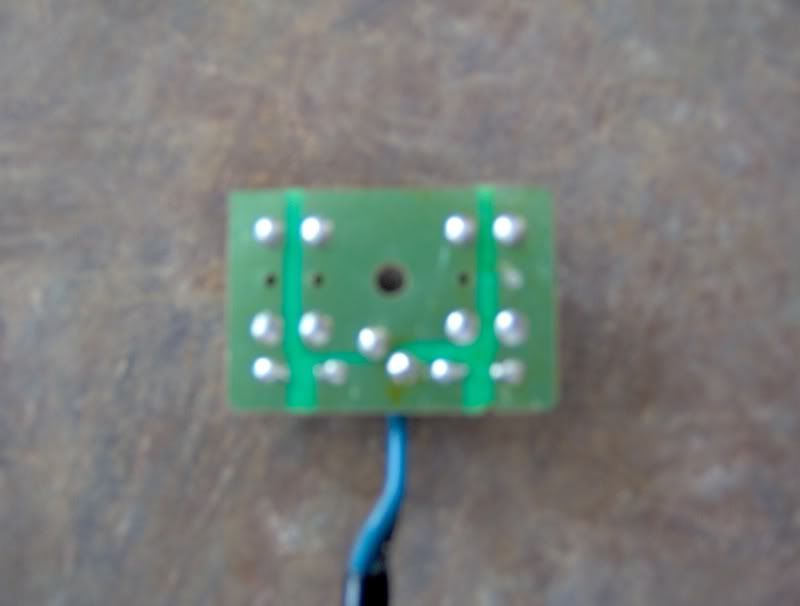

I then soldered a wire on each side of the factory switches on the board ( for paralleling the new switches ) and crimped "bullet" connectors to them. I purchased two black "momentary on/off" switches from The Source and crimped connectors on each wire of each switch. This way if the switch(s) fail, I can remove them without messing up the board.
Now taking my upper steering column cover, I drilled two holes where the switches would be located. Refer to bottom for best placement ( the one is picture was a screw up and the underside "HITS" the column internals ). But the idea is there for another style of switch perhaps.
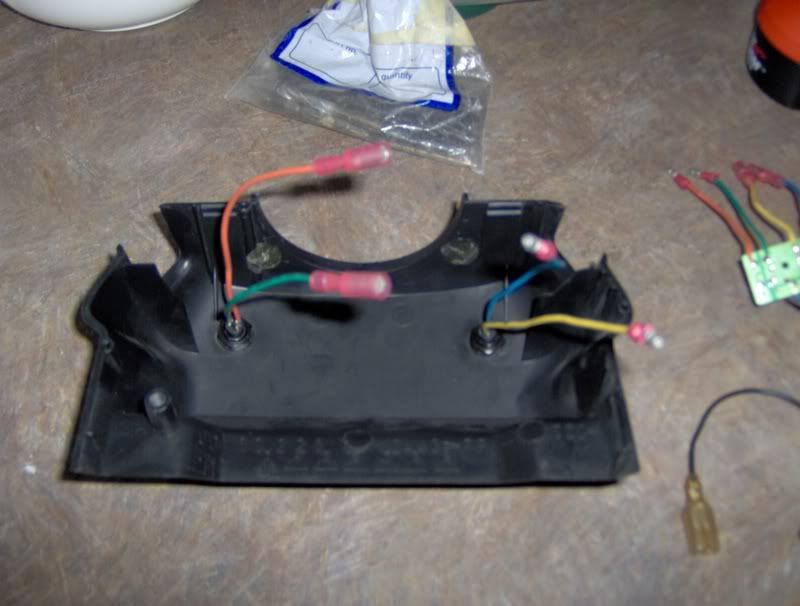
After securing them with the supplied switch nuts, I used a "hot melt" or "glue gun" and placed a big enough drop on the underside of the cover. Placing the board onto the glue, and pressing down until glue cooled. Once the board is set, attach the bullet connectors from the switches to the board.
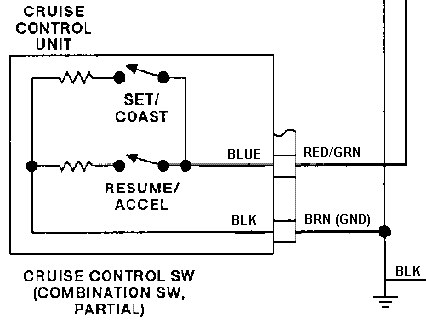
Now cut the black and blue wires from the factory plug assembly. Cut back some of the "sheathing" and strip the two wires. Crimp a bullet connector on each wire. On the column, there is the factory wiring harness. Cut and strip back "only" the red/green and brown wires. Crimp bullet connectors on each wire. Connect those wires to the black and blue wires ( check out wiring diagram above ). Now everything is hooked up.
I took a spin to see if everything worked and sure enough it did.
Now reassemble the upper and lower cloumn housings and you are good to go.
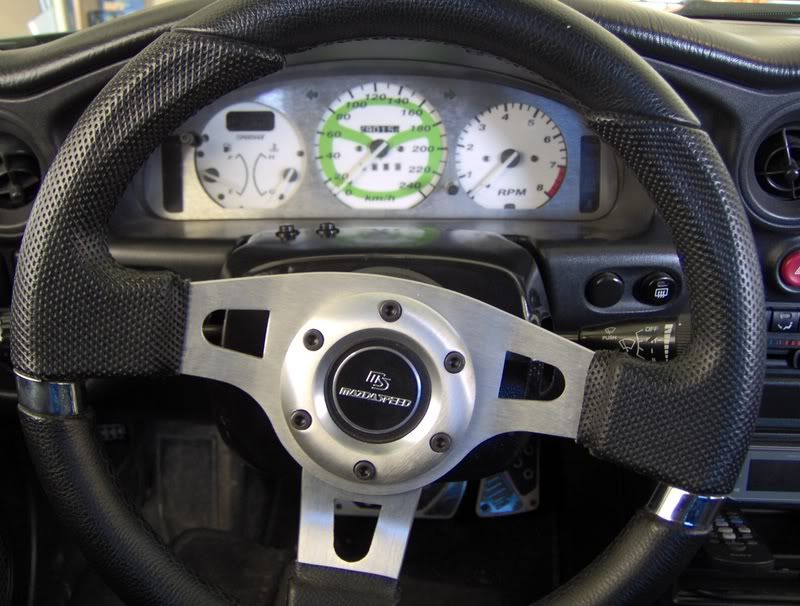
Here is my finnished setup:
First off, I bought this steering wheel from a fellow MX'r on the board and purchased the MOMO hub to convert.
So undid the bolts from behind the wheel to reveal the wiring and lock nut for removal. Disconnected the wires and removed nut. I rented a steering wheel puller as I like all my teeth
Remove the upper and lower column covers to get at the wiring harness later.
Remove the "power ring" so it is easier and cleaner to trim the raised part of it for power to your horn (if you want it) I used a dremel with a fine sanding disc to shave down the power ring to expose the right "prong" of the ring. If you orientate the ring so the raised portion is at the top, the right one. If you don't want power to the horn, just trim the piece right off flush.
Next I drilled a hole in the hub where the "exposed prong" is located. Make sure the hole is big enough that it won't make contact. After checking the hole clearance, I crimped a connector on the prong. I installed the hub and tightened the lock nut.
I removed the factory cruise control board from the factory assembly.
I then soldered a wire on each side of the factory switches on the board ( for paralleling the new switches ) and crimped "bullet" connectors to them. I purchased two black "momentary on/off" switches from The Source and crimped connectors on each wire of each switch. This way if the switch(s) fail, I can remove them without messing up the board.
Now taking my upper steering column cover, I drilled two holes where the switches would be located. Refer to bottom for best placement ( the one is picture was a screw up and the underside "HITS" the column internals ). But the idea is there for another style of switch perhaps.
After securing them with the supplied switch nuts, I used a "hot melt" or "glue gun" and placed a big enough drop on the underside of the cover. Placing the board onto the glue, and pressing down until glue cooled. Once the board is set, attach the bullet connectors from the switches to the board.
Now cut the black and blue wires from the factory plug assembly. Cut back some of the "sheathing" and strip the two wires. Crimp a bullet connector on each wire. On the column, there is the factory wiring harness. Cut and strip back "only" the red/green and brown wires. Crimp bullet connectors on each wire. Connect those wires to the black and blue wires ( check out wiring diagram above ). Now everything is hooked up.
I took a spin to see if everything worked and sure enough it did.
Now reassemble the upper and lower cloumn housings and you are good to go.
Here is my finnished setup: