93GS Tear down and rebuild - by Onlytrueromeo UPDATE 10/03

In this section, Users can post worklogs for their vehicle and show users their projects. (MX-3 ONLY!). Please create only ONE topic when starting a project, and DO NOT create 2 worklogs for the same vehicle, even though they are different projects. READ THE STICKY!
User avatar
onlytrueromeo
Senior Member
Posts: 2756
Joined: May 16th, 2007, 10:05 pm
Location: Albany, NY

93GS Tear down and rebuild - by Onlytrueromeo UPDATE 10/03

Post by onlytrueromeo »

Finally decided to start a worklog. Haven't had much time lately, though I've had the car in the garage since the day I brought her home, I did not take many pictures from when I first bought her before I started taking parts off.

Bought the car for $2000 down in New Jersey. Sure, it's a lot to pay for a stock GS (not even an SE) but you get what you pay for. I bought the car from the nephew of the original owner, who acquired the car after his Aunt's death a few weeks prior. She had bought the car new when she was 65, and it spend it's whole life never seeing snow, and being garaged day in and day out. Car came from Florida. :D

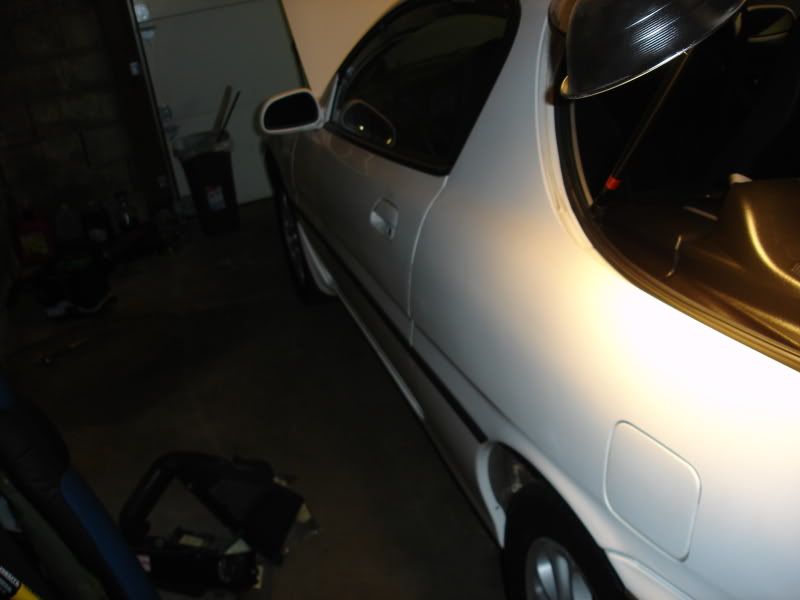
Pictures don't do the car justice. Everything but the paint on the car is MINT, and even the paint is not bad for a 17 year old car. There is 1 dent a few inches wide, and a few small dings, but nothing that can't be pulled out pretty easily. The plastics are all in tact, no stains on the carpet, non smoker, no fading or cracking in seatbelts/dash, ANY of the rubber seals. And the best part is NO RUST!! No rust in any of the usual locations, not even surface rust from what I can tell. Car has original undercoating on, and having never been driven in the snow, it's held up great.

Image

Image

Image

Image

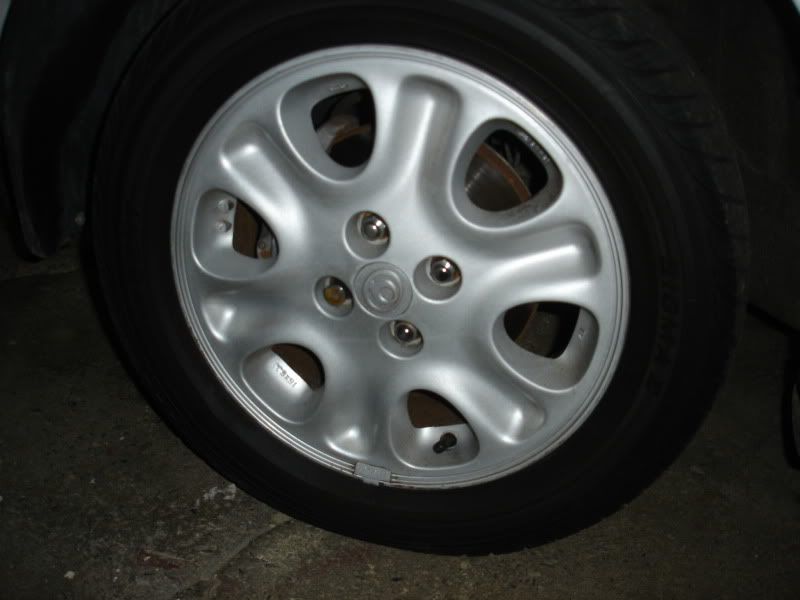
Wheels AS-IS, no polishing done by me. Factory lugs and locks!
Image


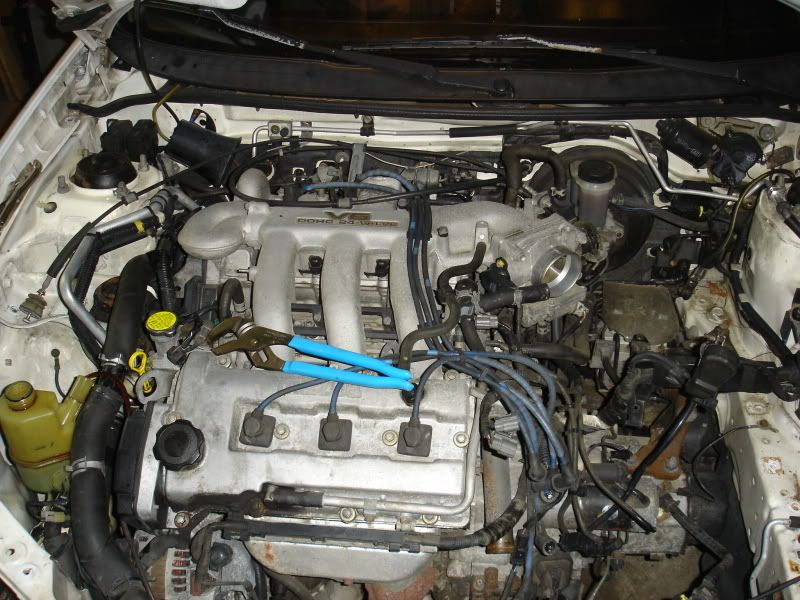
Engine purrs beautifully, and sounds better than the ZE I have with no lifter ticking. For now it's going to sit in the engine bay until I can swap it into my daily driver when I have the funds to rebuild the ZE thats in there :)

Image

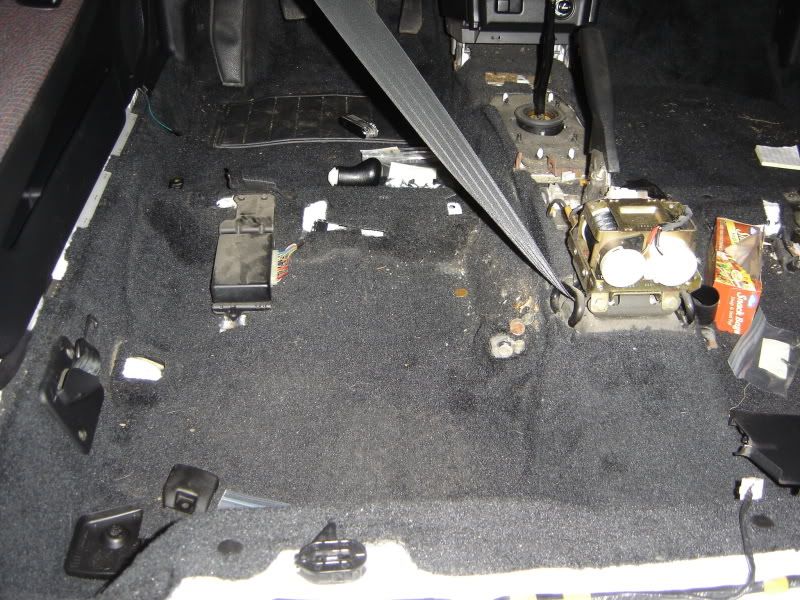
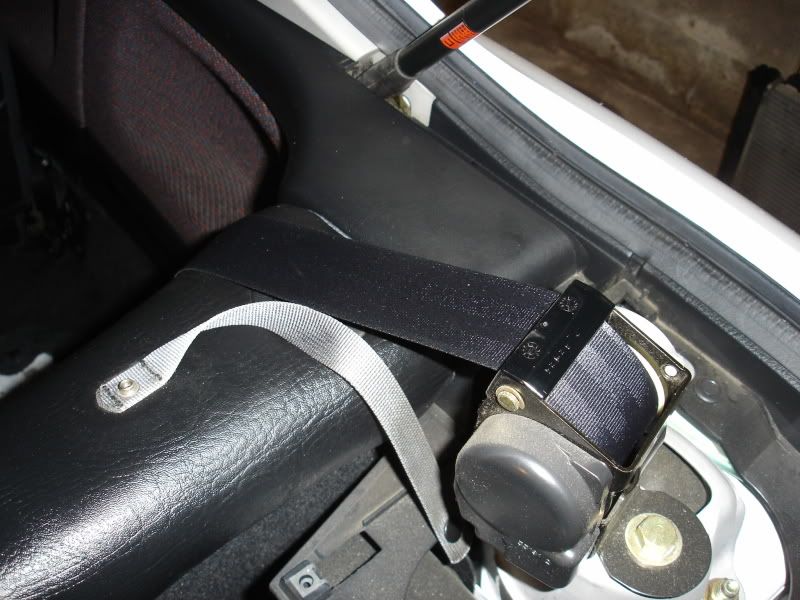
My first steps were to rip apart the backseat and take out the fuel pump since the once in my DD was giving me problems. Then I started disassembling random stuff in no particular order. I like taking stuff apart :D

Image

Wanted to disconnect the battery and such, to prevent it from draining slowly. Other things happened to come off as well..
Image

This is my filing system so I don't lose anything. It has worked great so far! I will start to take pics to go along with it once I disconnect engine components - too many wires to remember.

Image

Of course it's hard to work on a car without a workshop of some sort. Here's my basement, which includes some of my new "toys" as the girlfriend puts it. 11.5 SCFM Air compressor, air dryer next to it. Also a crazy high CFM fan for when I paint/powdercoat. The cabinets/shelves etc. I got for free at a Pharmacy that was closing down.

Image
Image

One thing I couldn't fit in the basement was my powder coating oven, so it will stay out in the garage behind the car for now :) Hopefully I can get it running soon. (just need to wire it up, its 220V after all). Yes, it's ridiculously large.

Image
Last edited by onlytrueromeo on October 3rd, 2010, 9:42 am, edited 3 times in total.
User avatar
onlytrueromeo
Senior Member
Posts: 2756
Joined: May 16th, 2007, 10:05 pm
Location: Albany, NY

Re: 93GS Tear down and rebuild - by Onlytrueromeo

Post by onlytrueromeo »

With the long weekend and all, I had some more time to work on the car. Haven't touched it in almost a month due to work/family/friends etc getting in the way of my project! Not to mention 3 other cars to maintain that all needed maintenance at once. Priorities though, so she sat on the back-burner until now.

Started the day off removing more stuff from the trunk/backseat, etc. Went on to remove the rear hatch rubber seal and clean all the goopy sealant off the metal. I need a nice clean surface so I can wire wheel everything before starting my welds :welder:

Image

Image

Heres how she looks from the front.
Image


Before I can start welding anything, or removing the old seam sealer, I need the car to be in a stable, flat position with the suspension unloaded. Unfortunately I don't have a car lift, so I had to do everything the old fashioned way with jackstands.

Image

The car currently rests on four 5-Ton Jack Stands, with 2 more 2-Ton stands for safety support under the pinch welds. The stands under the pinch welds are unloaded, and sit beneath wood that I carved a channel into with my table saw (no Dado here) to distribute the load. They were crucial to getting the car up to the level I wanted, but are now only used for a "safety net". Getting the car this high is no easy task with no one to help, and I did not want to tip the car over!

Car measures 13" from pinch weld to concrete in the rear, and 13.5" from pinch weld to concrete in the front. I have not decided yet if this is level enough for my purposes, but after the car sits for a few days I will go down to verify the Left to Right measurements have not changed. These are the most crucial as I don't want the frame to bend/twist out of whack while I grind out all the seam sealer and stitch weld the chassis.

Anyone have any input on this? How should I measure to make sure the car is level and secured in a manner so that it won't warp during stitch welding? I will only be doing small segments at a time to minimize the impact, and will leave the seam sealer in place until I am ready to weld nearby. I will also take care not to work in the same area for long periods of time to make sure I don't exert too much welding heat into the base metal. I'm a newbie at this, and want to make sure I do everything right.
User avatar
fowljesse
Supporting Member
Posts: 5676
Joined: March 17th, 2006, 2:59 pm
Location: portland, OR
Contact:

Re: 93GS Tear down and rebuild - by Onlytrueromeo

Post by fowljesse »

I'm very interested in this, and have no input, as you have thought of everything that I would have suggested..
Nice toys :)
I hope it all goes great!
'93 GS - P&P DE w/ ZE exh. cams/ pistns, KLG4 IM, 65mm TB, MSnS, Phenos, K&N RAI, UDP, Grnd wires, rear batt, filld MM, torq strt, TWM short shftr, Exedy, Lng tube hdrs 2.5" Side exhaust, H&R sprngs, Poly bushngs, strutbars, Alum. crss mmber&tiebar, 22mm swybar, solid links, Direzzas, leather int, Alpine 9805 stereo & alrm, keyless entry, 10 Boston Accoustics spkrs, Prjectrs, Blaster2, CF hood, FG hatch, Lexan
User avatar
umcamara
Supporting Member
Posts: 1892
Joined: June 12th, 2007, 3:15 am
antispam: No
Location: Winnipeg, Manitoba, Canada

Re: 93GS Tear down and rebuild - by Onlytrueromeo

Post by umcamara »

You sir are my idol right now. Nice work. I just graduated from mechanical engineering, and am on the hunt for the big job right now. Regardless of what my future may hold for me, I fully intend to do what you're doing (not to this extent though).

I however am a sucker for the 94+ dash style, and want my next Mx3 to have airbags (not the suspension ones).

Curtis
'96 Silver Stone Metallic MTX RS
'98 BMW 328is M-Tech

Feedback Thread
User avatar
onlytrueromeo
Senior Member
Posts: 2756
Joined: May 16th, 2007, 10:05 pm
Location: Albany, NY

Re: 93GS Tear down and rebuild - by Onlytrueromeo

Post by onlytrueromeo »

Thanks for the comments guys :)

I am also a sucker for the 94+ dash, and I did the swap into my DD '92. I am 99% sure I will carry that over to this car, but the other 1% is screaming that this interior is too perfect.

I got some more work done on the car yesterday, removed the front seats and some of the dash trim. Mint unused ash tray that will be up for sale soon! The seat rails have 0 rust, and even under the seats is relatively clean. Found $1 in change...woot! Moar pics when I get home from work!
User avatar
onlytrueromeo
Senior Member
Posts: 2756
Joined: May 16th, 2007, 10:05 pm
Location: Albany, NY

Re: 93GS Tear down and rebuild - by Onlytrueromeo

Post by onlytrueromeo »

Had another couple hours to work on the car today. It's nice having owned 2 other MX3's besides this one, I know all the tips and tricks, and how to remove things as painlessly as possible without breaking stuff (hopefully). I've learned (or am still learning) patience with it, which is probably the #1 most important thing when working on projects like this. I don't rush anymore, and take my time while listening to good music and drinking a beer!

AC/DC Pandora playlist on my ghetto-fab table with multitude of electronic goodies. All of this was acquired for free from craigslist, aside from the stereo and 1 one of the fridges, which were given to me as presents 7+ years ago. Both of those are beer fridges, which get run only when we have parties.

Image

Removed the seats last night, was surprised to see how clean everything was underneath. Also removed some of the dash pieces, and center console trim.
Image

Got the back bumper off today. The area behind it was quite dirty, as to be expected. I like a clean work environment, so that's where I started. Here is a shot showing the progress.
Image

What are you up to in here?
Image

Cleaning continued, through I still have more to go. Left rear wheel well, before:
Image

And after (still needs more work, but that will wait until another time, I'm interested in getting the loose gunk off):
Image

Made a mess getting it off, luckily I have this that I got as an anniversary gift a couple years ago :)
Image

At this point the dog decided I was taking too long, so he laid down.
Image


Not much else to say, mostly just taking parts off slowly, bagging and tagging the nuts and bolts, and cleaning what I can. One question for everyone though - what is the purpose for the rear vents? In my '92 I sealed them off with RAAMMAT for SPL/SQL reasons, but don't think I noticed a difference since I'm not competing. I always thought they were supposed to relieve the pressure difference when closing doors, or using A/C, etc. Thoughts?

Heres a pic if you don't know what I'm talking about.
Image
User avatar
AaronTietje
Regular Member
Posts: 1196
Joined: August 21st, 2009, 5:24 pm
antispam: No
Location: Prattsburgh NY

Re: 93GS Tear down and rebuild - by Onlytrueromeo

Post by AaronTietje »

Nice work and super clean car for NY. I went to Jersey to get a clean one.

I would say that you are correct on the rear vents. (to relieve cabin pressure)
We all want to be fast and look cool. Cool changes but fast never does.
User avatar
onlytrueromeo
Senior Member
Posts: 2756
Joined: May 16th, 2007, 10:05 pm
Location: Albany, NY

Re: 93GS Tear down and rebuild - by Onlytrueromeo

Post by onlytrueromeo »

Heh yeah I went to NJ too, I lucked out!

I looked into removing the vents, everyone seems to think it's a bad idea except the crazy SPL guys! Looks like they'll be stayin in place.
User avatar
onlytrueromeo
Senior Member
Posts: 2756
Joined: May 16th, 2007, 10:05 pm
Location: Albany, NY

Re: 93GS Tear down and rebuild - by Onlytrueromeo

Post by onlytrueromeo »

Did a bunch of work this week, though it may not look like it.

First, I finished draining the gas and brake fluid. I had planned on dropping the gas tank first, but forgot it was easier to do the rear subframe, so the gas tank will wait for a little while.

Image

Still need to remove those PITA bolts from the LCA's, my AIRCAT 1200k can't budge em and I don't want to let it hammer on them for too long yet. Some soak time with PB blaster this week, and hopefully by next weekend they'll break loose.
Image

I also spent a good amount of time stripping the undercoating off the wheel wells. So far its 3hrs on the first, and I'm not done with it. Eeep. Better be worth the work!

Image
User avatar
AaronTietje
Regular Member
Posts: 1196
Joined: August 21st, 2009, 5:24 pm
antispam: No
Location: Prattsburgh NY

Re: 93GS Tear down and rebuild - by Onlytrueromeo

Post by AaronTietje »

The wheel well looks great. I just did mine except I had a ton of extra undercoat on it.
We all want to be fast and look cool. Cool changes but fast never does.
User avatar
AaronTietje
Regular Member
Posts: 1196
Joined: August 21st, 2009, 5:24 pm
antispam: No
Location: Prattsburgh NY

Re: 93GS Tear down and rebuild - by Onlytrueromeo

Post by AaronTietje »

I used a wire wheel, what did you use?
We all want to be fast and look cool. Cool changes but fast never does.
User avatar
onlytrueromeo
Senior Member
Posts: 2756
Joined: May 16th, 2007, 10:05 pm
Location: Albany, NY

Re: 93GS Tear down and rebuild - by Onlytrueromeo

Post by onlytrueromeo »

Using a wire wheel as well. The undercoating is up to 1/8" thick in some spots, then the ugly drips in the corners. It's a PITA but I don't want to melt it off - I will save that for the places I can't reach with the drill.
User avatar
fowljesse
Supporting Member
Posts: 5676
Joined: March 17th, 2006, 2:59 pm
Location: portland, OR
Contact:

Re: 93GS Tear down and rebuild - by Onlytrueromeo

Post by fowljesse »

those vents in the rer also allow you to run the fresh air vents.
Why are you stripping the wheel wells? That's going to be loud. If it's for weight savings, you can mold in felt.
'93 GS - P&P DE w/ ZE exh. cams/ pistns, KLG4 IM, 65mm TB, MSnS, Phenos, K&N RAI, UDP, Grnd wires, rear batt, filld MM, torq strt, TWM short shftr, Exedy, Lng tube hdrs 2.5" Side exhaust, H&R sprngs, Poly bushngs, strutbars, Alum. crss mmber&tiebar, 22mm swybar, solid links, Direzzas, leather int, Alpine 9805 stereo & alrm, keyless entry, 10 Boston Accoustics spkrs, Prjectrs, Blaster2, CF hood, FG hatch, Lexan
User avatar
onlytrueromeo
Senior Member
Posts: 2756
Joined: May 16th, 2007, 10:05 pm
Location: Albany, NY

Re: 93GS Tear down and rebuild - by Onlytrueromeo

Post by onlytrueromeo »

I'm stripping the wheel wells so they can get repainted and re-undercoated. The entire underside of the car will get the same treatment. The car is 17yrs old, the undercoating is holding up well for now, but there are already small areas where it's falling off or was not put on 100%. Also, I know the typical areas for rust to start in the MX3 and I want to fight the problem before it starts.

Plus I want to be able to say I didn't skip something when rebuilding the car :) New paint won't stick well to old undercoating, I can't get it clean.
User avatar
onlytrueromeo
Senior Member
Posts: 2756
Joined: May 16th, 2007, 10:05 pm
Location: Albany, NY

Re: 93GS Tear down and rebuild - by Onlytrueromeo

Post by onlytrueromeo »

Been awhile since an update, didn't have too much time until recently to work on the car...but work I have. Engine's out, dash is out and most of the wiring harness is tagged and will be removed soon. Pics to come!

EDIT:
Here are the pics I promised. I'll get some more of the interior later today when I pull the wiring harness completely. Nothing special, just removal shots!

Image

Image

Image

Lots of cleaning to do...forgot that the engine would leak coolant everywhere when I lifted her out...stupid me! Should have used my compressor to force it out a hose.
Image
Last edited by onlytrueromeo on August 29th, 2010, 8:56 am, edited 1 time in total.
Post Reply

Return to “MX-3 Worklogs”