Swaping your internal coil disributor for a remote style

What's the best intake? How do I swap a BPT? All common 4cyl questions are answered in this archive only forum.
Post Reply
User avatar
4gotn
Regular Member
Posts: 504
Joined: February 22nd, 2006, 2:24 am
Location: Pace Fl
Contact:

Swaping your internal coil disributor for a remote style

Post by 4gotn »

OK before i start credit for the swap gos to lazzer408 for doing the work and finding out how to do this.

In this wright up I will explain how to switch your 94 and up b6de "all in one" distributor for the more common and cheaper version which has an external coil and ignition module.

OK, for starters you will need to either go to your nearest auto parts store or friendly neighborhood junkyard and get ALL of the following items:
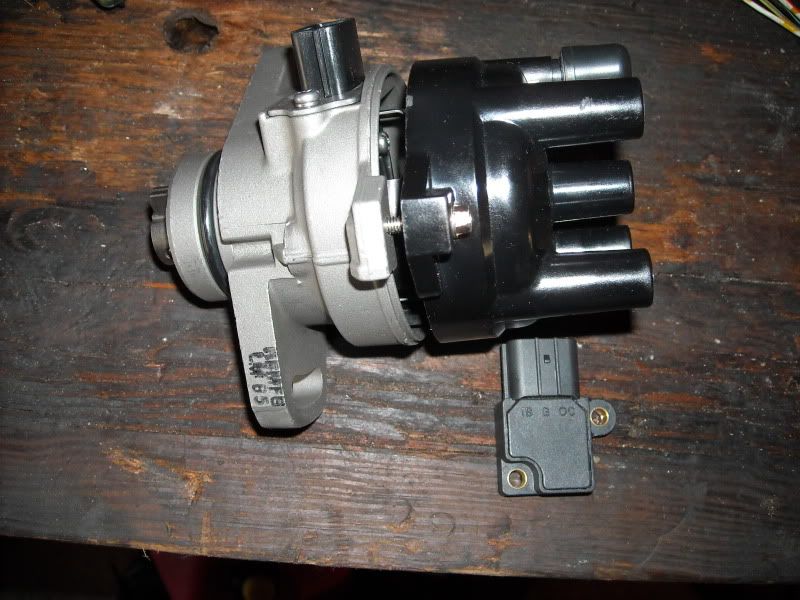
-any distributor off any model Mazda/ford with either a 1.5L,1.6L,1.8L,1.9L (i.e. ford escort, mercury tracer, Mazda 323/protege) as long as the distributor has a 4 wire lead going into the distributor and four plug wires coming out
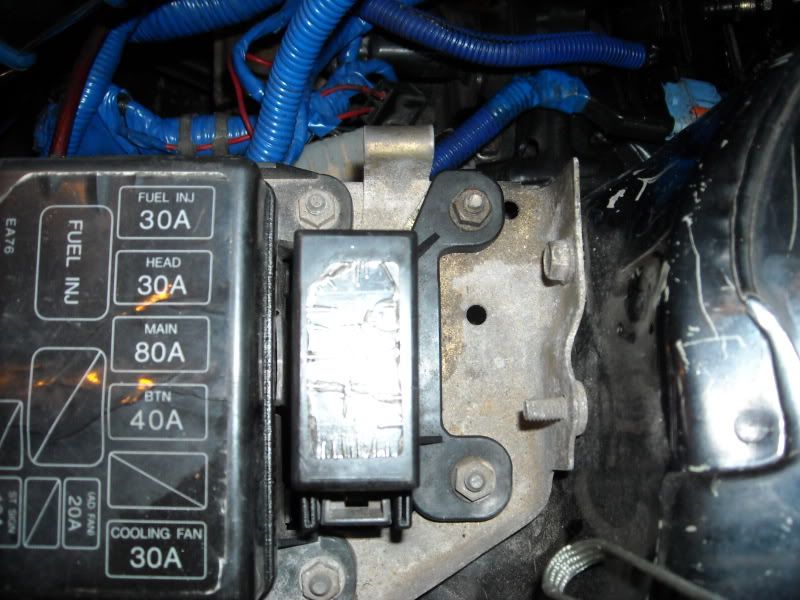
-an ignition module off any of the same vehicles (this part is located on the fuse block plate right under the ignition coil, take the bolts with it)
-an radio interference capacitor/R.I.C. off same vehicle (this is right above the ignition module and is sandwiched between the fuse block bracket and the coil)
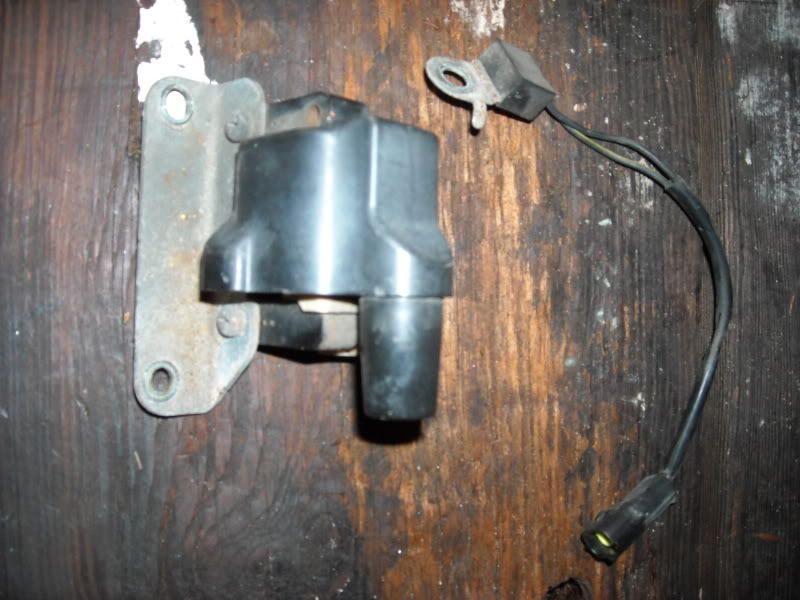
-an ignition coil off any of the same vehicles (located next to the fuse block..hard to miss)
-an extra spark plug wire to go from the coil to the distributor (you can make these or buy them)
-OK now this is the important part, you will need the pigtails going to each of these parts and they are only available from a junked car but luckily are plentiful. when you pull these pigtails you need to leave yourself a LOT of room mainly for mistakes and measuring so CUT WISELY.

Examples of parts needed:
Image
Image
Image


lesser parts i recommend getting just to do it professionally:
-some 10-12/12-14 gauge crimp connectors preferably with heat shrink to get that extra seal
-a pair of GOOD crimps and a wire cutter
-electrical tape
-heat shielding (if its what you prefer)

OK, now that we've spent all of our money on parts we get to the fun part, Prep/Installation. Obviously, we start by taking the old parts off of the vehicle...which is just the distributor...hopefully you can accomplish that :p.
examples of parts:
Image
Image

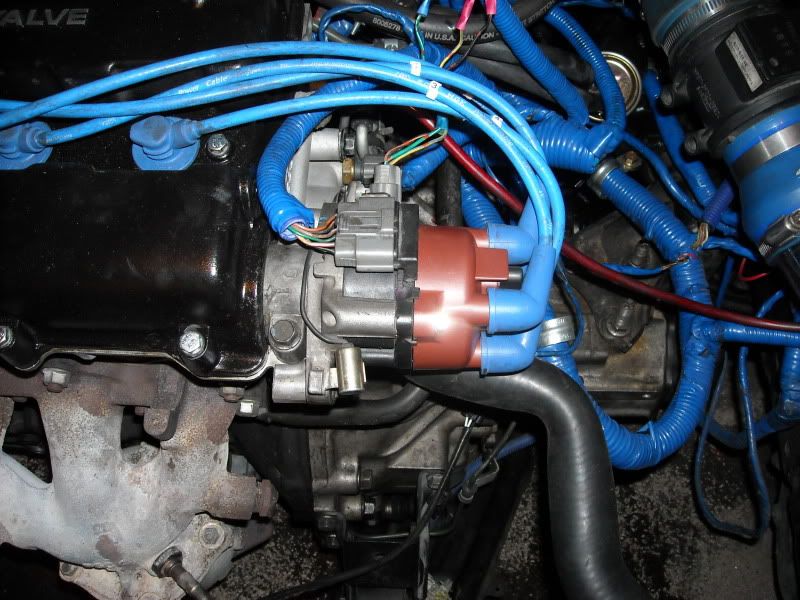
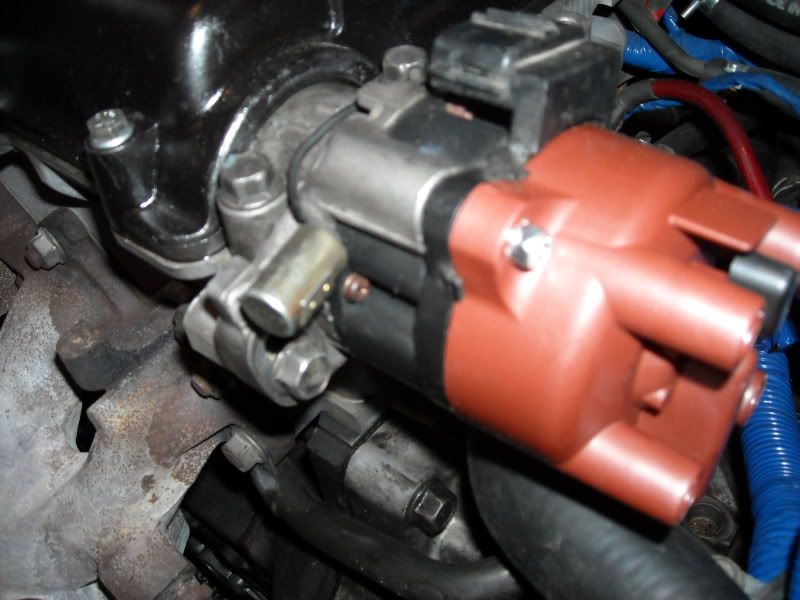
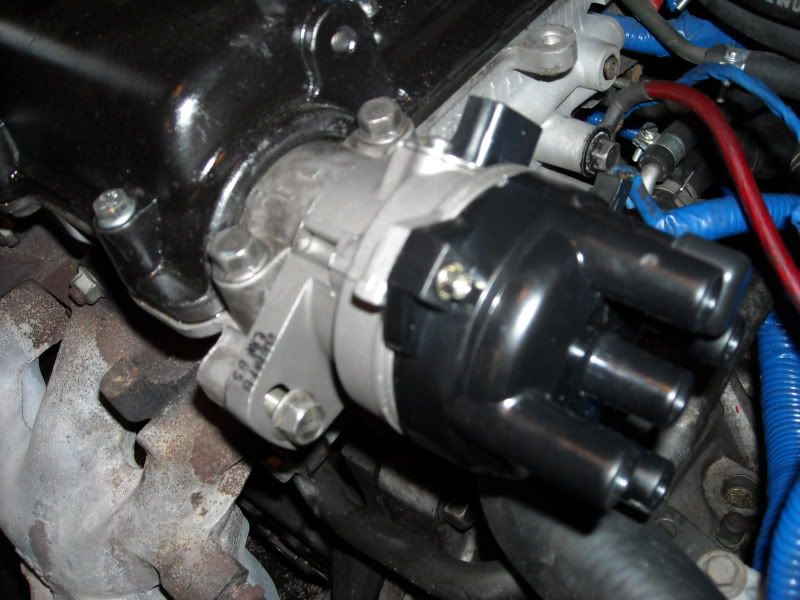
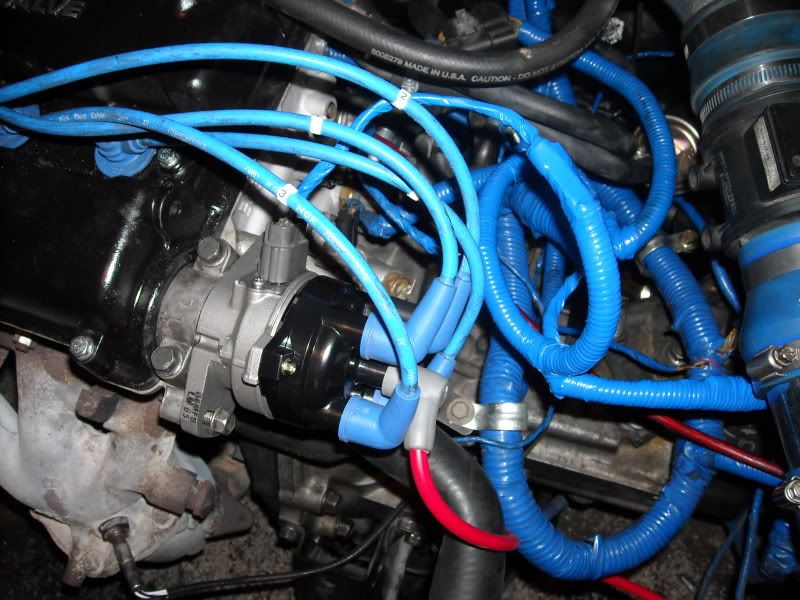
From this point I installed the new distributor simply to keep my internals from being exposed to the weather so i recommend the same.
Image

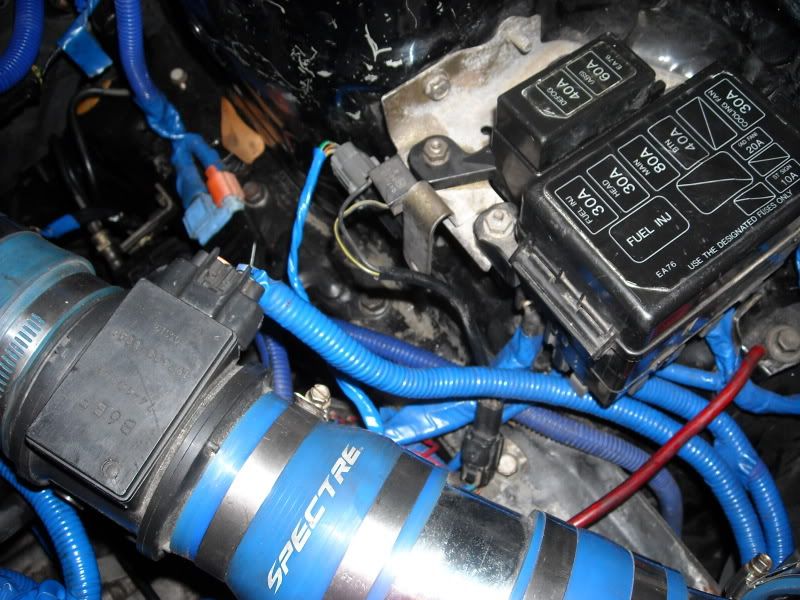
Next we want to remove the fuse block and its bracket. (there are two bolts and four nuts you need to remove to take the bracket off of the block/body)
Image

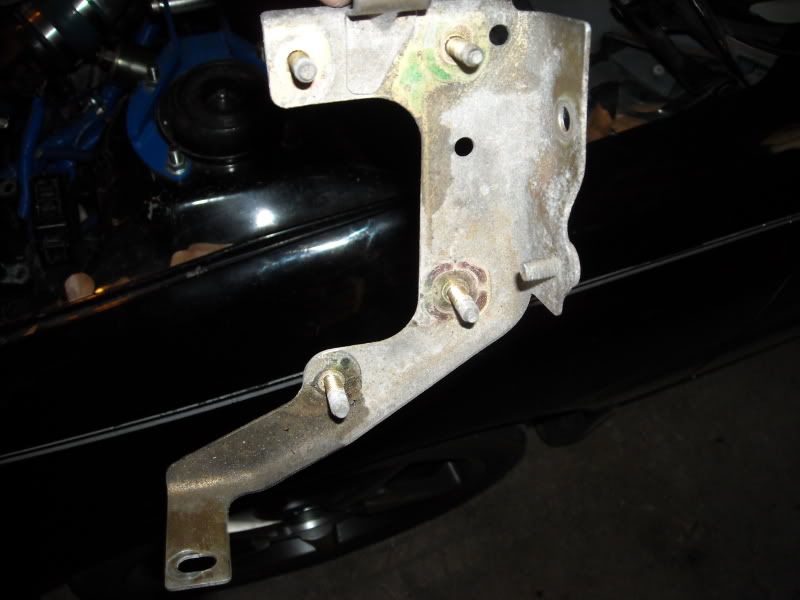
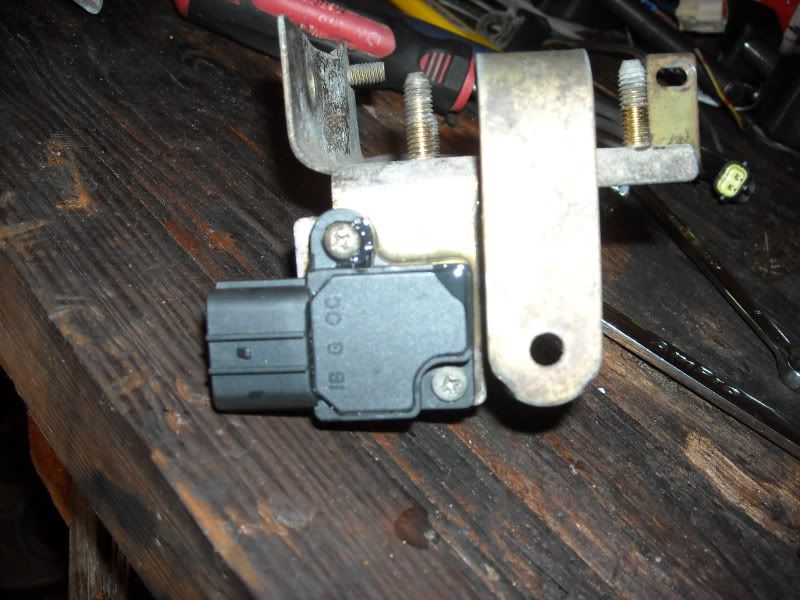
This will be the finished product. Please keep in mind you will be using the bracket as a heat sink for the r.i.c. and the module so CLEAN IT.
Image

Now we need to install the module. Please make note the direction that i placed it, this is probably the easiest direction to access the plug from so i recommend doing it the same. Also, there is a packet of die-electric grease that came with the coil...use it liberally.
Image
Image

From this point, we need to reinstall the bracket in the reverse manor but before attaching the fuse block we need to place the R.I.C. on the post closest to the ignition module and place the block over the top of it.
Image

:At this point you can choose to mount your coil any where you chose. I was unable to attach it to the same place as it was on the vehicle i pulled it from because of the difference in the fuse block (the 94 and up has 2 extra relays that inhibit you from installing the coil in the same spot) so i just installed and msd blaster 2 coil. :D :

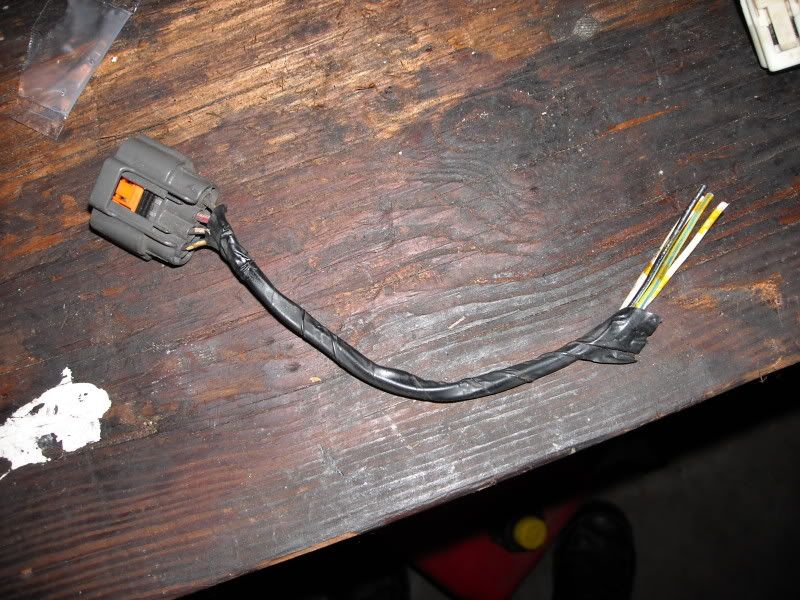
Now that we've put on all our new goodies we get to wire the suckers up. Start by cleaning up the wires and striping all the heat shielding and excess wires. This is what i ended up with:
Image
Image

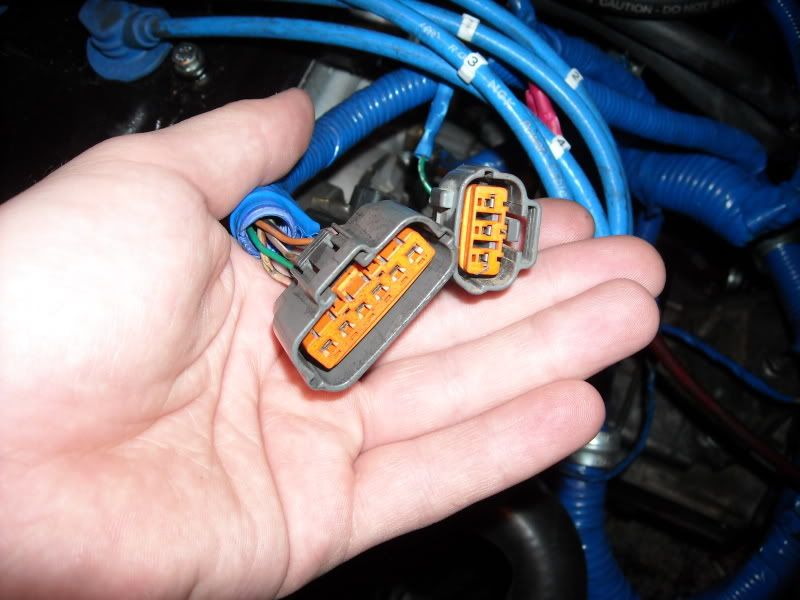
Next we want to prep our factory wring harness to be spliced. Cut these two plugs off and remove the heat shielding a few inches back to give yourself enough room.
Image

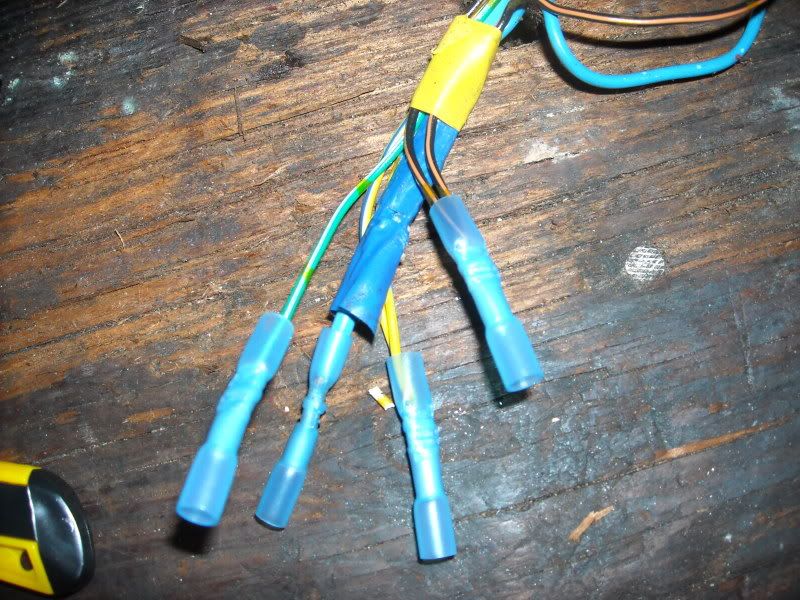
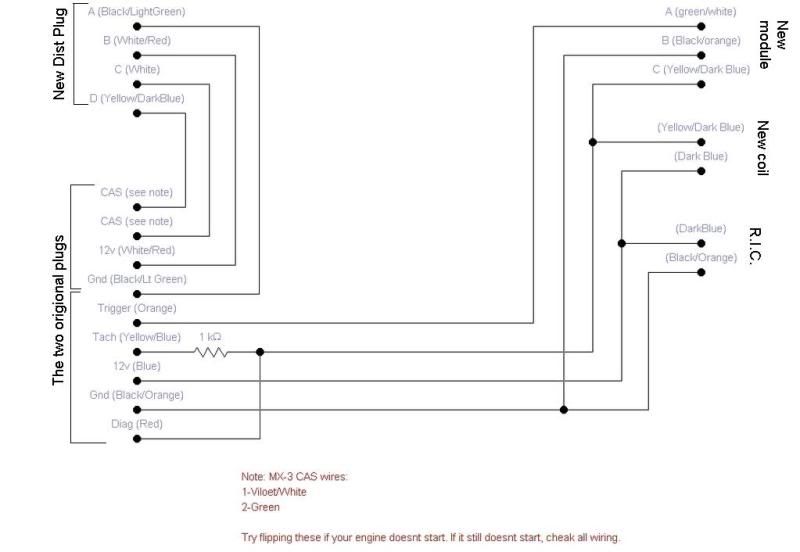
There are a few wires on the main jumble that will need to be crimped together to be adapted to the old harness. The colors are yellow/blue and black/orange so crimpy away.
Image

This next part your on your own but you shouldn't have too much trouble attaching the wires being as its just a color match up. This is the wiring diagrams made by lazer408 with a little more clarification for those of you not familiar with the car.
Image

After you wire up everything you should have something like this. (mine is already wrapped)
Image
Image

and enjoy

if you have any questions you can pm me and ill do the best i can to get back
happy hunting
Last edited by 4gotn on May 20th, 2011, 3:17 pm, edited 3 times in total.
1994 MX-3 1.6L B6DE 16v DOHC - rear disc swap, nix power steering/ac, Corksport f&r strut tower bars, Pedders urethane control arm bushings, urethane motor mounts, steel braided brake lines, painted dash, protege tranny
90 Miata w/ b6, Konig Lightspeed rims, Cams (boost to come soon)
74 Porsche 914 w/ 1.8L - restoration prooject

Image
lazzer408
Regular Member
Posts: 153
Joined: September 16th, 2007, 11:14 pm
Location: Illinois

Re: Swaping your internal coil disributor for a remote style

Post by lazzer408 »

Just an update...

The conversion to the single coil setup is still on my 3 and working flawlessly.

-IF- the ECU was the same as the Miata (might be able to swap?) you could drive the Toyota 1ZZ-FE coil-over-plug setup that I came up with for my Miata. The thread for that conversion is on the miataturbo forums.

http://www.miataturbo.net/forum/t12704/" onclick="window.open(this.href);return false;

Braineack is now handling that swap and I believe he's selling the adaptor harness and mounting plate but remember this is for the Miata that has an ECU with 2 trigger outputs. The mounting plate would probably work but you'd have to chop up his adaptor harness so you might as well grab the connectors off the car you get coils off of. You'd have to wire up a 94+ Miata ECU in your MX3 in order to do this conversion anyways. Just thought I'd note it.

Happy Boosting!!
User avatar
4gotn
Regular Member
Posts: 504
Joined: February 22nd, 2006, 2:24 am
Location: Pace Fl
Contact:

Re: Swaping your internal coil disributor for a remote style

Post by 4gotn »

you should do a wright up on that when hes done
i wanted to do that quite a while ago but i dont too much trust cop setups because they break so easily but im sure someone might

anyone want to sticky this thread>??
1994 MX-3 1.6L B6DE 16v DOHC - rear disc swap, nix power steering/ac, Corksport f&r strut tower bars, Pedders urethane control arm bushings, urethane motor mounts, steel braided brake lines, painted dash, protege tranny
90 Miata w/ b6, Konig Lightspeed rims, Cams (boost to come soon)
74 Porsche 914 w/ 1.8L - restoration prooject

Image
lazzer408
Regular Member
Posts: 153
Joined: September 16th, 2007, 11:14 pm
Location: Illinois

Re: Swaping your internal coil disributor for a remote style

Post by lazzer408 »

The Toyota COPs are running strong for alot of Miatas. I haven't heard of any failing yet. Braineack isn't working with MX3s so It's unlikely you'll find a guide for COPs on the MX3. -IF- I do the conversion to my 3 I'll let you guys know how. :welder: back to work.
cricketol2
Regular Member
Posts: 209
Joined: February 10th, 2008, 9:00 am

Re: Swaping your internal coil disributor for a remote style

Post by cricketol2 »

cool thanks nice to know thanks i was looking for something like this thread

thanks again
p.s. how would i set up a msd system to this mod would there be anything special i would have to do?
lazzer408
Regular Member
Posts: 153
Joined: September 16th, 2007, 11:14 pm
Location: Illinois

Re: Swaping your internal coil disributor for a remote style

Post by lazzer408 »

If you wanted to fire the single coil with an MSD box go for it. The single coil setup is a 2 wire coil so MSD wiring should be fairly simple. Don't waste your money on MSD though. The single coil with seperate distributor and OEM 7mm wires fires 12psi on a .032" gap without a miss. Buy the things you need not things you don't. MSD isn't needed.

EDIT - If your running boost and talking about the MSD 'boost timing master' then YES! it will work! and in that case it is a worth while investment. :D
cricketol2
Regular Member
Posts: 209
Joined: February 10th, 2008, 9:00 am

Re: Swaping your internal coil disributor for a remote style

Post by cricketol2 »

so adding a msd coal and a MSD-6A Ignition Control would really not help any .. even with gas mileage?
lazzer408
Regular Member
Posts: 153
Joined: September 16th, 2007, 11:14 pm
Location: Illinois

Re: Swaping your internal coil disributor for a remote style

Post by lazzer408 »

Not in my opinion. I used to run the MSD in my Monza back in the day and I didn't notice any improvement in power, driveability, or miliage. MSD is Multiple Spark Discharge. It fired multiple times for each pulse from the stock ignitor. How many sparks does it take to ignite the mixture? One. What it did do was burn up my coils in a few months so I had to buy the MSD (blaster?) coil.

Having turbocharged the BP@10psi using the stock single coil system and .032 gap NGK BKR7ES-11 coppers I can vouch for it being able to fire the gap under load with zero misfires. I still got ~32mpg highway with the BP if I behave. =)

If anyone has trouble finding the NGK BKR7ES-11 plugs, go to an ATV retailer. It's used in the Polaris Sportsman iirc.
cricketol2
Regular Member
Posts: 209
Joined: February 10th, 2008, 9:00 am

Re: Swaping your internal coil disributor for a remote style

Post by cricketol2 »

well im asking because i have an idle problem .. i fixed it (the most part really cracked a valve) :( and i still have a idle problem i read up on it and it said it can be the coil or the icv i was going to get a bigger tb and the icv will be on the new tb but would it work... question can you get to top speed with the stock coil i can not brake 90 so would that mean it the coil?
Post Reply

Return to “4-Cyl. FAQ”